
React is not only a tool for building great frontends. It can also link up to APIs, creating endless possibilities for new functionality.
React is a JavaScript library, so interfacing with APIs is the same as in vanilla JS.
We’ll go over the fetch API in this article. It makes HTTP interfacing much easier with its simple syntax and callbacks.
We’ll then learn how to use the fetch API to make POST requests. Once you know how to do so, the other HTTP methods (GET, PUT, DELETE, etc.) should be easy to implement, as they all use similar syntax.
Let’s get started!
APIs
API stands for “Application Programming Interface”. They are the way we interact with complex pieces of software.
We often need functionality in our web apps outside of our own code. We use APIs to utilize software that can help us with this.
HTTP Requests
We use HTTP requests, such as POST, to “talk to” APIs over the web. With HTTP requests, we can access resources outside of our own domain (where our web app is stored).
These resources can include files, databases, compute functions, and more.
Besides added capability, using outside resources allows us to make data accessible to all instances of our web app. For example, if we want to keep track of user data for logins, by putting this data in a database in the cloud, all instances of our web app can access it from the client side.
POST
POST is used when we want to send data to a web address.
POST is different from PUT because it’s used to create new data entries at the destination, whereas PUT is meant to modify the same one (for example, in a database).
The fetch() API
The fetch API is a great way to make HTTP requests. An added benefit is that it’s build right into JavaScript, so you don’t have to install any additional dependencies.
First, we’ll create some JSON for use in the example:
{
    "users": [
        {
            "name": "alan",
            "age": 23,
            "username": "aturing"
        },
        {
            "name": "john",
            "age": 29,
            "username": "__john__"
        }
    ]
}
JSON stands for JavaScript Object Notation. It’s a really simple way of storing data based on key-value pairs.
In the JSON above, we have several key-value pairs. “users” maps to an array (denoted by the “[]”). The array contains more objects (denoted by “{}”), each of which has several intuitive key-value pairs.
We’ll now POST this JSON data to a backend. In this example, we’ll be POST-ing to a very simple WSGI (Python) server, using the Flask framework:
If the Flask code looks unfamiliar, don’t worry — you won’t have to understand how everything works. The purpose of the example is to show what’s happening on the backend we are doing the fetch() to.
After running the code via the terminal, we get the following output for the address the server is running on:

We now know the address we’ll have to do the fetch() to. With our JSON data and Python server set up, we can focus on the React code and do a POST request using fetch():
function Component() {

  var jsonData = {
    "users": [
        {
            "name": "alan",
            "age": 23,
            "username": "aturing"
        },
        {
            "name": "john",
            "age": 29,
            "username": "__john__"
        }
    ]
  }

  function handleClick() {

    // Send data to the backend via POST
    fetch('http://------------:8080/', {  // Enter your IP address here

      method: 'POST',
      mode: 'cors',
      body: JSON.stringify(jsonData) // body data type must match "Content-Type" header

    })

  }

  return (
    <div onClick={handleClick} style={{
      textAlign: 'center',
      width: '100px',
      border: '1px solid gray',
      borderRadius: '5px'
    }}>
      Send data to backend
    </div>
  );

}

export { Component };
When we run the React code, we get the following output in the browser:
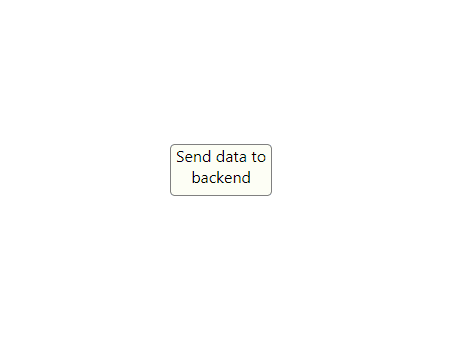
The output is simple — just a button rendered to the screen. It uses a few simple React inline styles to accomplish this.
When we click on the button, the handleClick() function is called. It contains a fetch().
We pass the URL we identified from the Flask output above as the first parameter in the fetch(). This specifies the address we are sending data to.
For the second parameter, we specify a JavaScript object. It contains several variables which will determine how the fetch operation is executed.
First, we specify the ‘method’, POST.
Then, we specify the value of ‘mode’. Since the Flask server is being hosted on a different port on our machine (8080) than the React app, we have to specify the value as ‘cors’.
All this means is that data will be sent across origins. Different ports on the same machine count as different origins!
Finally, we specify the actual data we’re sending in the ‘body’ variable. We send a stringified version of our JSON above by using JSON.stringify(). This step is important, as it allows the data to be transferred properly (the Python server will not be able to parse the JavaScript object in its original form).
Let’s click on the button and see what gets rendered server-side:

It worked! Now we know how to POST data to our backend.
POSTing Forms via fetch()
What if we want to send more than one string of data? We can do so with a form. We’ll make some slight modifications to our code to send multiple pieces of data:
function Component() {

  var jsonData1 = {

    "name": "alan",
    "age": 23,
    "username": "aturing"

  }

  var jsonData2 = {

    "name": "john",
    "age": 29,
    "username": "__john__"

  }

  function handleClick() {

    var formData = new FormData();
    formData.append('json1', JSON.stringify(jsonData1));
    formData.append('json2', JSON.stringify(jsonData2));

    // Send data to the backend via POST
    fetch('http://-----------:8080/', {

      method: 'POST',
      mode: 'cors',
      body: formData // body data type must match "Content-Type" header

    })
  }

  return (
    <div onClick={handleClick} style={{
      textAlign: 'center',
      width: '100px',
      border: '1px solid gray',
      borderRadius: '5px'
    }}>
      Send data to backend
    </div>
  );

}

export { Component };
In the example above, we switch from using the stringified JSON as the body of the fetch() to using a FormData. FormData is a built-in JavaScript object that mimics HTML forms.
What this allows us to do is create the FormData (in the example, we use a variable called “formData”) and then .append() key-value pairs to it. We append two pieces of JSON.
When we click the button, we get the following output server-side:

As we can see, the FormData was successfully sent, and we see a list of the appended items in the console.
That’s it for sending POST requests in React. If you have any questions or comments, please leave them below.
💬 Leave a comment