
In this lesson, we’ll cover React state, how it works, and how we can use the useState Hook to build a simple dice rolling app. Let’s begin!
React Dice
By the end of this tutorial, you’ll have mastered state in React using the useState Hook. We’re going to cover the following topics during this tutorial:
Skip the tutorial and go straight to the full code.
- Understand what state is in React and why it’s necessary.
- Adding state to a React Component.
- Adding multiple state values.
- Using state inside of a React Component.
- Updating state with a new value.
- Updating multiple state values.
If you haven’t ventured over to React Hooks yet, why not read my Simple Introduction to React Hooks.
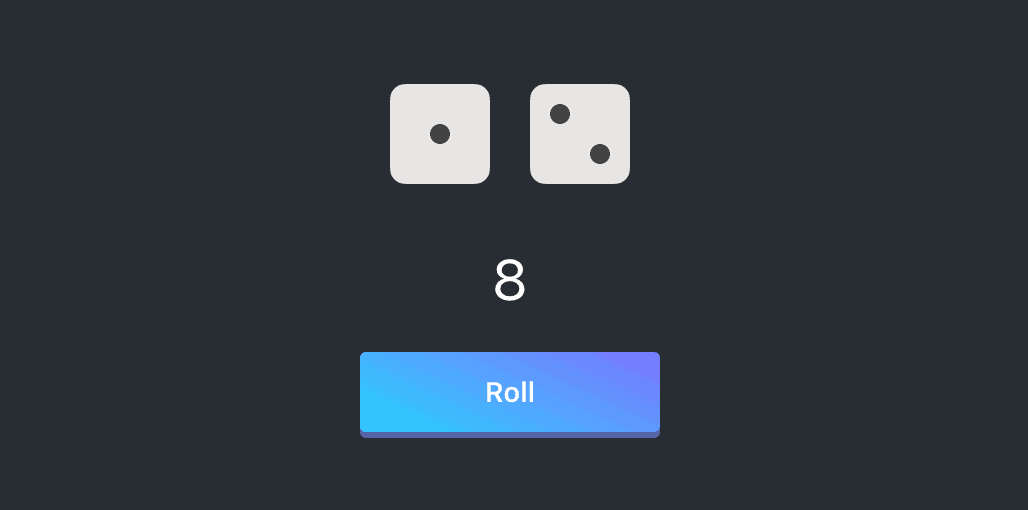
Let’s take a look at the web app that we’re going to create. After finishing, you’ll have a fully functioning dice rolling web app that looks like this:

Continue reading to learn how to set up a new React project using Create React App. Alternatively, skip straight to The Full Source.
React Project Setup
As always, we need a fresh, new React project to begin crafting our dice rolling app. I always use Create React App to spin up a new React project.
Open up a new Terminal window and type in the following code to generate a new React app:
npx create-react-app react-diceOnce the project generation is complete, open up the entire react-dice folder in your favorite IDE or editor.
Writing the Component
Whenever I create any new React component I always begin by scaffolding out the HTML and CSS until I’ve got a component that looks great and fulfills the requirements.
That means I don’t touch any JavaScript at the beginning. ✋⚛️
Open up App.js and replace the entire contents of that file with this code:
⚠️You’re going to need images of dice for the below code to work! Lucky for you, I’ve made them available as a zip file. Download a .zip of the Dice assets and drop the .png files in the /src/assets directory.
import React from 'react';
import './App.css';

function App() {

 const firstDieImage = require(`./assets/1.png`);
  const secondDieImage = require(`./assets/2.png`);

  return (
    <div className="App">
      <header className="App-header">
        <div style={{ display: 'flex', margin: 20 }}>
          <img src={firstDieImage} className="die" alt="Die one" />
          <img src={secondDieImage} className="die" alt="Die two" />
        </div>
        <span>8</span>
        <button className="button">Roll</button>
      </header>
    </div>
  );
}

export default App;
Next, open up App.css and replace the entire contents of the file with the following classes:
.App {
  text-align: center;
}

.App-header {
  background-color: #282c34;
  min-height: 100vh;
  display: flex;
  flex-direction: column;
  align-items: center;
  justify-content: center;
  font-size: calc(16px + 2vmin);
  color: white;
}

.die {
  width: 50px;
  height: 50px;
  margin: 10px;
}

.button {
  margin-top: 20px;
  outline: none;
  animation: button-gradient 25s ease infinite;
  background-image: -webkit-linear-gradient(65deg,#21d4fd,#b721ff 50%,#017eff);
  background-image: linear-gradient(25deg,#21d4fd,#b721ff 50%,#017eff);
  background-size: 500%;
  border: none;
  border-radius: 3px;
  box-shadow: 0 3px 0 0 #5664a7;
  color: #fff;
  font-size: 14px;
  font-weight: 600;
  height: 40px;
  width: 150px;
}

.button:hover {
  box-shadow: 0 2px 0 0 #5664a7;
}

.button:active {
  box-shadow: inset 0 2px 4px rgba(0,0,0,0.25), 0 1px 2px rgba(0,0,0,0.05);
}
Save both files, jump over to your running React app in the browser and you’ll see two beautiful looking dice, a result value underneath, and a big purple button.
Good stuff! Let’s move onto learning about state.
React State: What is it?
Here’s the thing. We have a beautiful looking dice rolling app……that doesn’t do anything.
Click the roll button. Nothing happens, right? The dice images don’t change, the big result number doesn’t go up or down.
It’s all very… static.
Well designed, interesting apps respond to change. Elements inside of them move.
In our dice rolling app, we want the images to change when the roll button is clicked, the result value to go up and down, etc.
We want our app to be dynamic.
That’s where state can help.
State allows us as developers to keep track of changes inside of our React components.
Without state, components would not be able to respond to change events like button clicks, hovering over a button, or words typed into input fields, or elements dragged and dropped.
Literally, anything that our users change inside of the React component is tracked inside of state values.
Adding State to the React Component
It used to be that state was only ever able to be used inside of Class Components. That all changed with the release of React 16.8.
We can now store state inside of Functional Components using the useState Hook.
To add state to a functional component, import the useState Hook from React, like so:
import React, { useState } from 'react';

...
Now we have access to the useState Hook in our component, let’s go ahead and initialize a new state value:
const [value, setValue] = useState(1);The line above may be confusing. Don’t panic, it was to me until I understood how the useState Hook works.
The useState Hook provides us an array containing two values:
- The actual value of the state.
- A function to update that value.
That’s it. Simple.
It may look confusing because we’re destructuring the array using fancy-schmancy ES6 syntax.
We’re assigning a variable name of value to the first value in the array (the state’s value), and then we’re assigning a variable name of setValue to the second value in the array (the function that updates the state value).
We could easily write the line above without destructing it:
const state = useState(1); // An array of two values

const value = state[0]; // The state value
const setValue = state[1]; // Function to change value
It’s really important to remember that you can name these two values whatever you want. In fact, we’re going to change them in our dice rolling app to be:
const [firstDieResult, setFirstDieResult] = useState(1);The final thing to note is that useState takes one argument: a default value.
In the code above, we’re setting the default value of firstDieResult to be 1. However, the default value can be set to anything: null, 45, ‘hello’, [‘one’, ‘two’].
Storing Multiple React State Values
React components can be complex. They can have many moving parts and therefore require multiple state values.
Inside of App.js, underneath the component name, add the following code to initialize multiple states:
...

function App() {
  const [firstDieResult, setFirstDieResult] = useState(1);
  const [secondDieResult, setSecondDieResult] = useState(6);

...
Alternatively, we can use a single state value and set the value of it to an object:
const [diceResult, setDiceResult] = useState({
  firstDieResult: 1,
  secondDieResult: 6,
});
Using State inside of the React Component
Now that we have two state values for storing the results of each die, let’s use those values to make our component more dynamic.
...

function App() {
  const [firstDieResult, setFirstDieResult] = useState(1);
  const [secondDieResult, setSecondDieResult] = useState(6);

  const firstDieImage = require(`./assets/${firstDieResult}.png`);
  const secondDieImage = require(`./assets/${secondDieResult}.png`);

...
We’re dynamically importing the image for each die by using string interpolation (another fancy-schmancy term for creating a dynamic string using variables).
Last but not least, replace the hard-coded result (currently 8) by adding both state values together:
  ...
    <div className="App">
      <header className="App-header">
        ...
        <span>{firstDieResult + secondDieResult}</span>
        ...
      </header>
    </div>
  ...
You’ll notice that we wrap the variables inside curly parentheses. That’s JSX syntax that allows us to write JavaScript inside HTML.
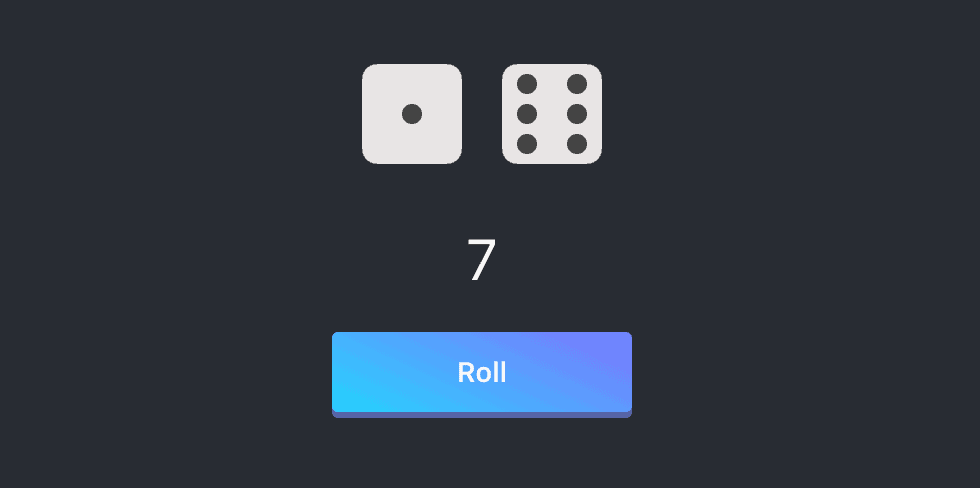
Save, open your browser and behold: A semi-dynamic app!
Updating the React Component’s State
Before we continue, let’s recap what we’ve covered so far in this tutorial about state in React.
Understand what state is in React and why it’s necessary.Adding state to a React Component.Adding multiple state values.Using state inside of a React Component.- Updating state with a new value.
- Updating multiple state values.
Now that we have two state values for storing the dice results, let’s add a function to update those state values when you click the roll button.
Just above the return statement, add a new function. We’ll call it, rollDice.
...

  function rollDice() {
    setFirstDieResult(Math.floor(Math.random() * 6) + 1);
    setSecondDieResult(Math.floor(Math.random() * 6) + 1);
  }

...
Ignore the Math.floor method for a minute and focus on the two functions. They’re for setting both of the state values. Whatever we pass as arguments inside of these functions will be the new values for firstDieResult and secondDieResult.
Because we’re simulating two die being rolled, we’re going to pass in a method that generates a random number between 1 and 6.
That’s what this line of code does:
Math.floor(Math.random() * 6) + 1Hence, we’re rolling two 6 sided die.
We need to modify the button element so that it runs our rollDice function when it’s clicked. So add an onClick prop and pass in rollDice.
...
<button className="button" onClick={rollDice}>Roll</button>
...
Save our component, jump on over to the browser for the final time, and you should see a pair of dice that change value whenever the button is clicked.

The Full Code
import React, { useState } from 'react';
import './App.css';

function App() {
  const [firstDieResult, setFirstDieResult] = useState(1);
  const [secondDieResult, setSecondDieResult] = useState(6);

  const firstDieImage = require(`./assets/${firstDieResult}.png`);
  const secondDieImage = require(`./assets/${secondDieResult}.png`);

  function rollDice() {
    setFirstDieResult(Math.floor(Math.random() * 6) + 1);
    setSecondDieResult(Math.floor(Math.random() * 6) + 1);
  }

  return (
    <div className="App">
      <header className="App-header">
        <div style={{ display: 'flex', margin: 20 }}>
          <img src={firstDieImage} className="die" alt="Die one" />
          <img src={secondDieImage} className="die" alt="Die two" />
        </div>
        <span>{firstDieResult + secondDieResult}</span>
        <button className="button" onClick={rollDice}>Roll</button>
      </header>
    </div>
  );
}

export default App;
💬 Leave a comment