There are a lot of solutions to global state management in Next.js, but one of the simplest methods is through the built-in useContext and useReducer hooks. You can use useReducer to manage your complex state, and the Context API to provide access to that state globally.
Global State vs Props
Everything in this article can also be accomplished by passing props through components and having one reducer at the top of your app. The benefit of this approach is to avoid “prop drilling”, or having to deeply pass props through components. I’d recommend this approach if you’re facing this issue; if you have a complex state that you need across the app. If you have a simpler app, then you may also be able to accomplish this purely through passing props.
Setup
To demonstrate this approach, we’re going to set up a simple project for the card game Higher or Lower. Simply put, a card is picked, and the player picks whether they think the next card will be higher or lower. This repeats until the player guesses wrong.
You can find the full link for the project here, but I’ll talk through the important parts here.
useReducer
useReducer put simply, is a more complex version of useState that you provide with a state, and a reducer function which takes a predefined action, and optionally a payload. You input a state and an action, and get a new state depending on that action. For a more in-depth look into useReducer, check out our article here.
Here’s our reducer:
function reducer(state, action) {
    if (action.type === 'higher' || action.type === 'lower') {
        const { guesses, cards } = state;
        return {
            guesses: [action.type, ...guesses],
            cards: [randomCard(), ...cards],
        };
    }

    if (action.type === 'undo') {
        const { guesses, cards } = state;
        const oldGuesses = [...guesses];
        const oldCards = [...cards];
        oldGuesses.shift();
        oldCards.shift();

        return {
            guesses: oldGuesses,
            cards: oldCards,
        };
    }

    if (action.type === 'reset') {
        return { guesses: [], cards: [] };
    }
}
Our state is an object keeping track of an array of cards guessed, and the guesses.
We have a few simple actions here, guessing and adding a card to our stack, undoing 1 move, or clearing the whole state.
useContext
The Context API in React allows you to create a context, which stores a value. Any child of a provider component of that context can access the value with the useContext hook. For more info on that, check out our article on Context in React.
We can combine this with useReducer, by providing our reducer through context. We can also then separate them even further, and provide the state and the dispatch separately. This means that any component that needs the state can read it through useGame(), and any component that wants to dispatch an action can do so through useGameDispatch().
export const GameContext = createContext({
    guesses: [],
    cards: [],
});

export const GameDispatchContext = createContext();

export function useGame() {
    return useContext(GameContext);
}

export function useGameDispatch() {
    return useContext(GameDispatchContext);
}

function WordleGameContextProvider({ children }) {
    const [state, dispatch] = useReducer(reducer, initialState);
    return (
        <GameContext.Provider value={state}>
            <GameDispatchContext.Provider value={dispatch}>
                {children}
            </GameDispatchContext.Provider>
        </GameContext.Provider>
    );
}
It’s also a very useful approach to wrap up our provider in its own component, to abstract away setting up the reducer and context providers.
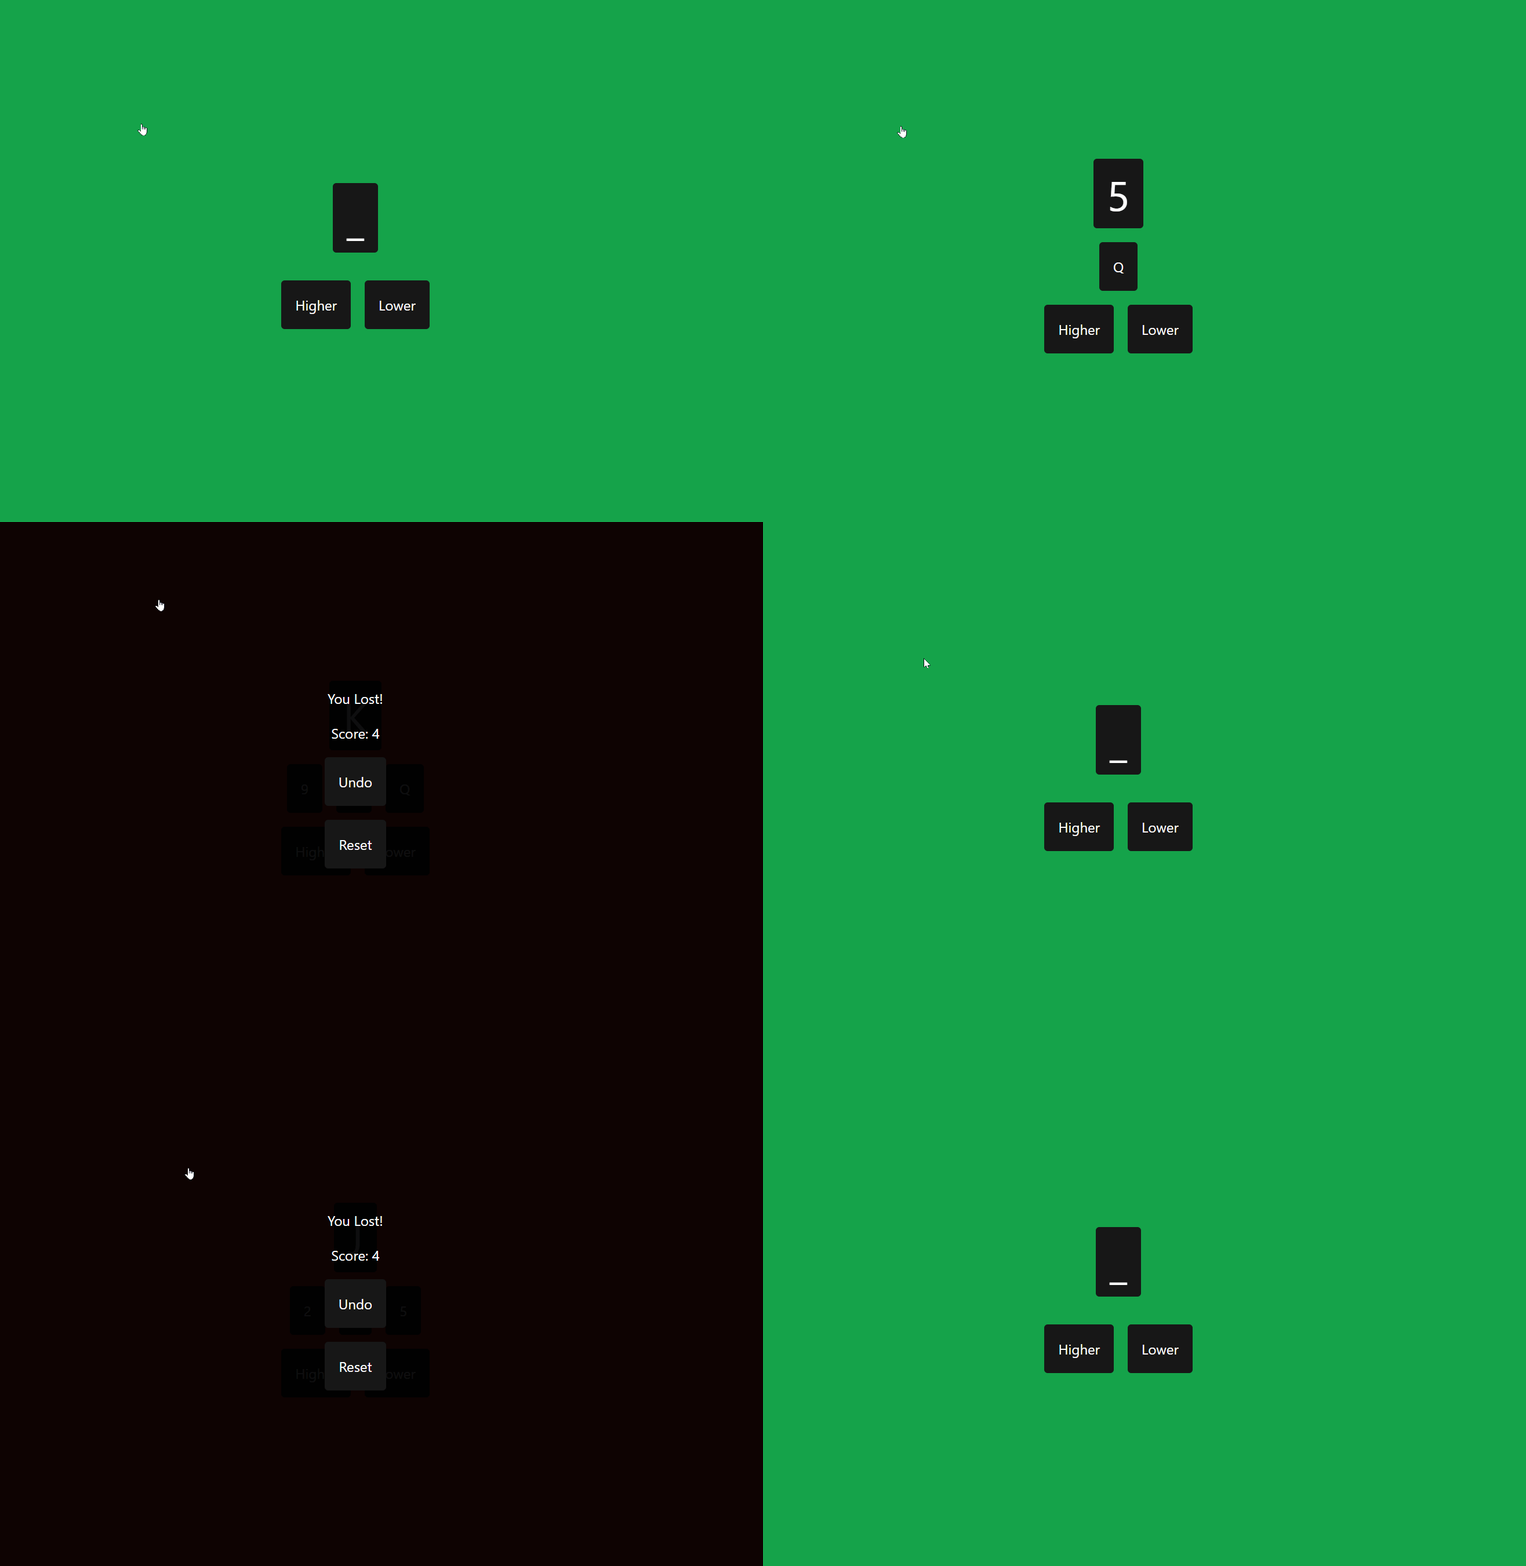
Here’s what our simple game looks like. You can guess higher or lower, if you’re right the card gets added to a stack, if you’re wrong then our game over overlay pops up. From that we can either undo the last move, or reset the game entirely.

State Management
The key part of this is avoiding “Prop drilling” by using our context provider hooks.
Our page component looks like this:
const Home = () => {
    const game = useGame();
    return (
        <WordleGameContextProvider>
            <Game />
        </WordleGameContextProvider>
    );
};
This is where we set up our provider, to the Game component and all of its children.
Inside our Game component:
function Game() {
    const game = useGame();

    return (
        <div
            className={clsx(
                'flex h-screen flex-col items-center justify-center gap-4 text-white',
                hasLost(game) ? 'bg-red-600' : 'bg-green-600'
            )}>
            {hasLost(game) && <EndScreenOverlay />}
            <LatestCard />
            <CardStack />
            <Controls />
        </div>
    );
}
Here we don’t need to dispatch any actions, so we can choose to just access our game state, to check whether or not the player has lost.
Let’s take a look at the end game overlay:
function EndScreenOverlay() {
    const { guesses } = useGame();
    const dispatch = useGameDispatch();
    return (
        <div className="absolute z-10 flex h-full w-full flex-col items-center justify-center gap-4 bg-[#000000F0]">
            <div>You Lost!</div>
            <div>Score: {guesses.length}</div>
            <button
                className="rounded bg-neutral-900 p-4"
                onClick={() => dispatch({ type: 'undo' })}>
                Undo
            </button>
            <button
                className="rounded bg-neutral-900 p-4"
                onClick={() => dispatch({ type: 'reset' })}>
                Reset
            </button>
        </div>
    );
}
I’ve added in some simple styling, built with TailwindCSS.
Here we can see we’re extracting the guesses array from our state using the useGame() hook. We can do something similar with the dispatch to create our undo and reset buttons.
Hopefully, this has been a helpful introduction to state management in vanilla Next.js. While this has been a more simple example, I hope you’ll be able to expand it to more complex state management in your application. Another common alternative to this approach is Redux, so check out that as well!
If you liked this post, if I haven’t covered everything you need, or if you have any more questions, let me know in the comments below!
💬 Leave a comment