Next.js is a popular open-source framework used for building web applications with React. One crucial aspect of web applications is authentication and authorization, which can be a complicated process to implement.
This is where Auth0 steps in. Auth0 is a cloud-based identity platform that simplifies the process of adding authentication and authorization to web applications. If you’re interested, we also have a similar article covering Auth0 in vanilla React. In this article, we will explore how to use Auth0 in Next.js applications.
Set-Up
Firstly you’ll need to set up Auth0, and sign up if you don’t already have an account here.
Once set up, you can create a new application for your Next.js app:

Once your application has been created, you’ll need to record the following:
- Domain
- Client ID
- Client Secret
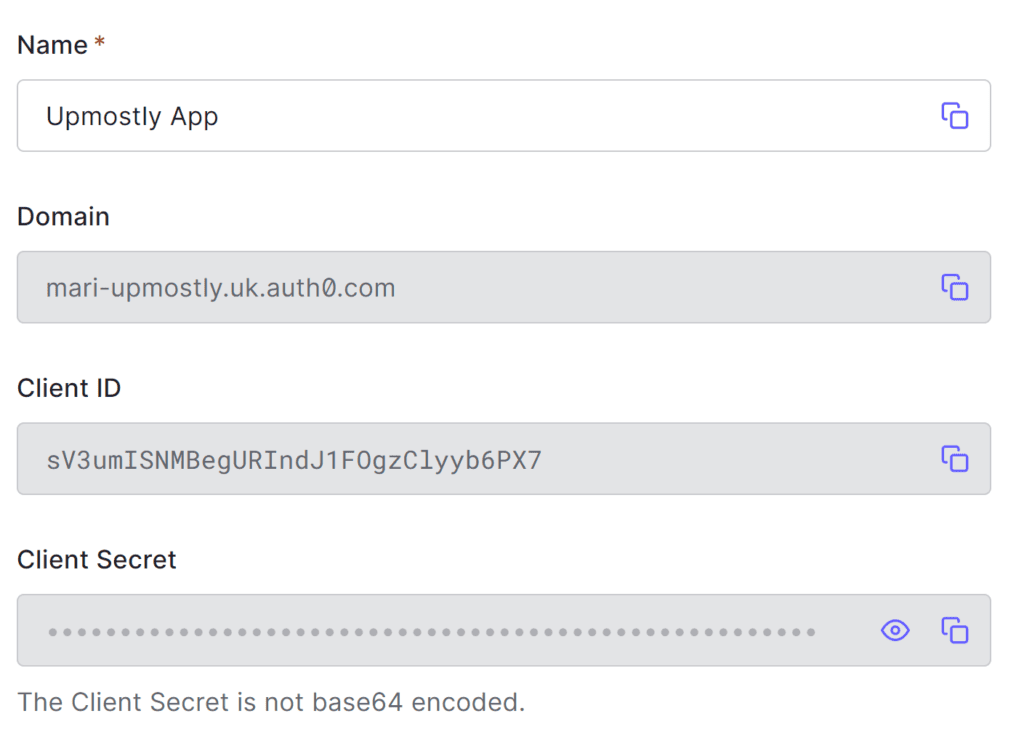
We’ll use these later in our Next.js app.
You’ll also need to head to your console and run the following command:
openssl rand -hex 32Note the hex string you get back down somewhere, as you’ll also need this later.
Next you’ll need to install Auth0 using:
npm install @auth0/nextjs-auth0Next.js
Now that you’ve added Auth0 to your Next.js project, it’s time to start implementing it. The first step is to add the values we’ve just created to our Next.js project. If you don’t already have a .env.local file, go ahead and create one, and add the following to it:
AUTH0_SECRET=
AUTH0_BASE_URL='http://localhost:3000'
AUTH0_ISSUER_BASE_URL=
AUTH0_CLIENT_ID=
AUTH0_CLIENT_SECRET=
You’ll have to fill in the blanks where:
- AUTH0_SECRET= The value created before using OpenSSL, used to encrypt your Auth0 session.
- AUTH0_BASE_URL= The URL your Next.js app is running on. The default value is ‘http://localhost:3000’, and you’ll know if you’ve changed this.
- AUTH0_ISSUER_BASE_URL= The domain created before, e.g. for my project, ‘https://mari-upmostly.uk.auth0.com’
- AUTH0_CLIENT_ID and SECRET are the Client ID and Secret provided before
If you’re a little advanced, you might also want to set up some different environments, e.g. your app might not be running on localhost in production. You can find out more about that here.
The final bit of setup we need to do is to set up our callback and logout URLs. These are URLs that Auth0 will expect you to redirect to when the user logs in, and logs out. We can add these in our settings:
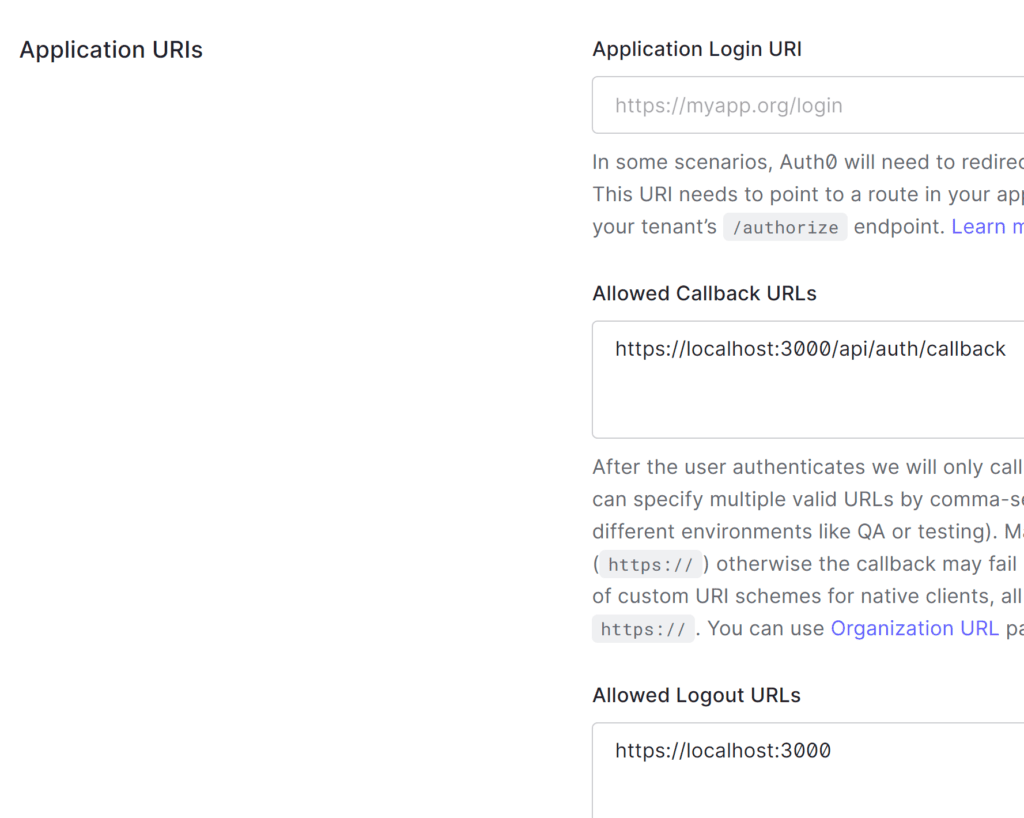
(And don’t forget to save your changes at the bottom!)
API Route
Next you’ll need to set up the API side of Auth0 by creating a new API path. Create a new path at “pages/api/auth/[…auth0].js” and add in the following:
import { handleAuth } from '@auth0/nextjs-auth0';

export default handleAuth();
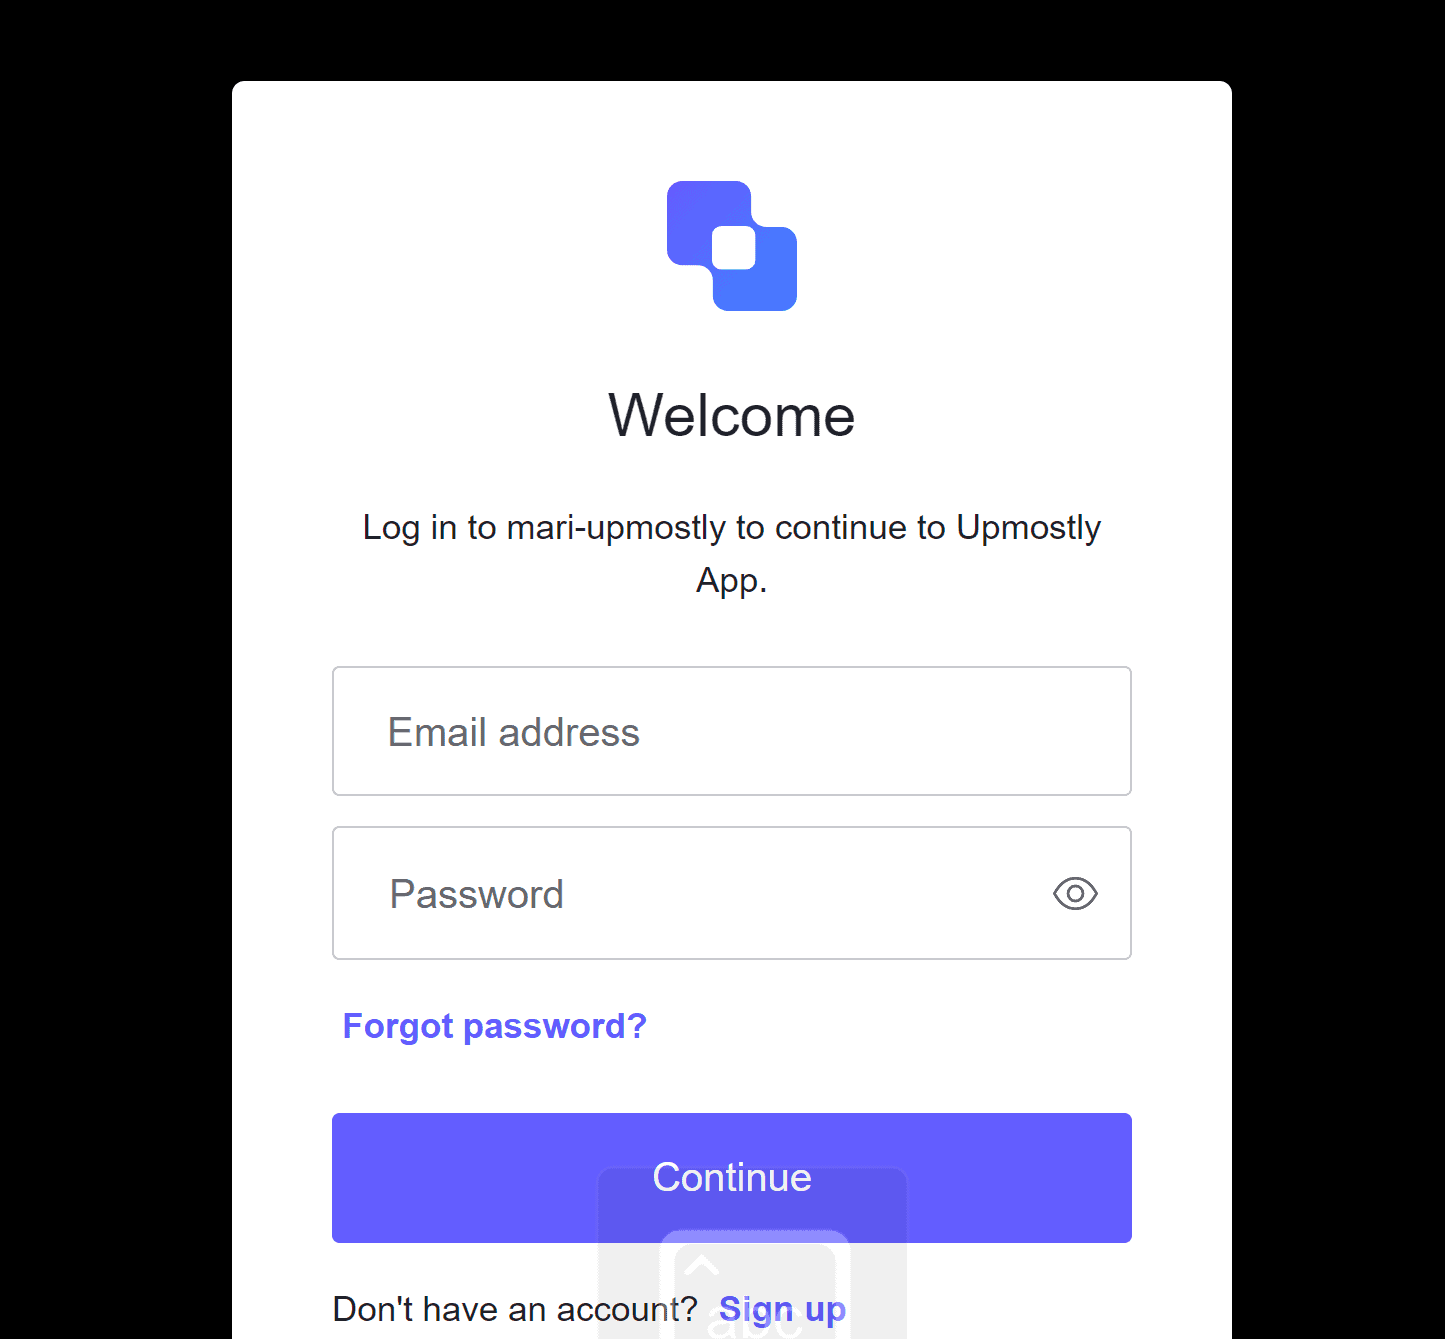
At this point, you should be able to head to {YOUR_APP_URL}/api/auth/login and be greeted by the following screen:
Front-End
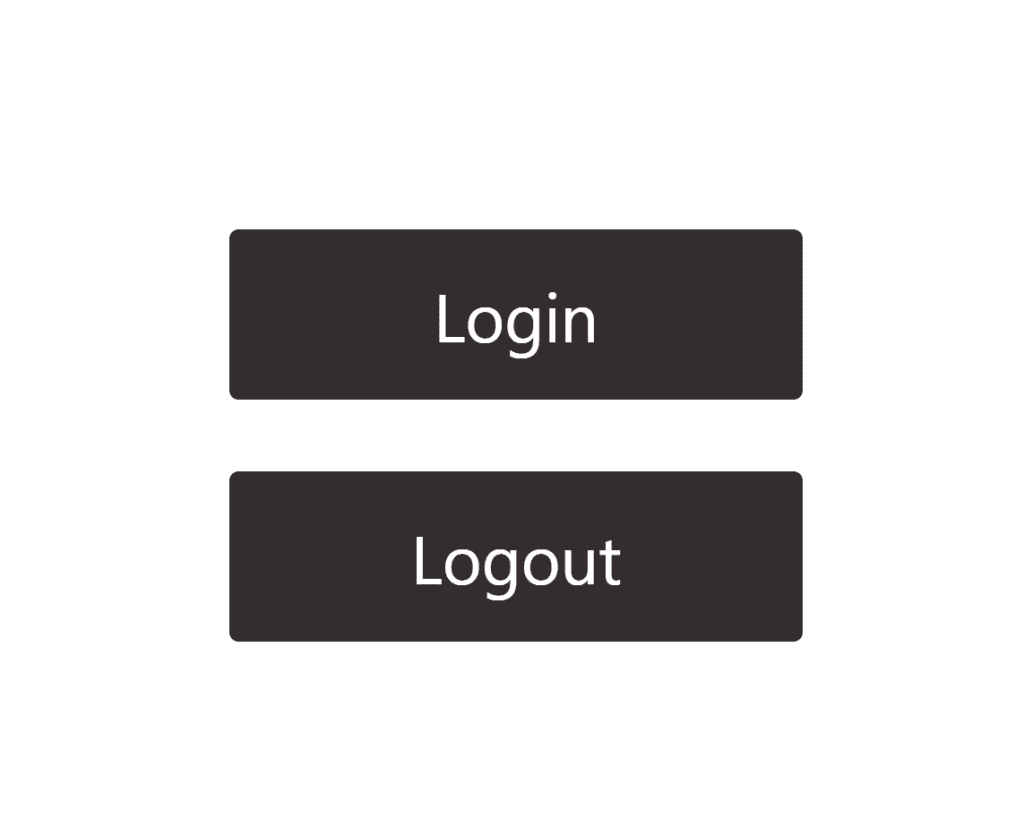
Back to the front end, let’s set up some links so the user can actually log in and out:
import Head from 'next/head';

export default function Home() {
    return (
        <div className="dark flex min-h-screen w-full items-center justify-center">
            <Head>
                <title>Hello World!</title>
                <link rel="icon" href="/favicon.ico" />
            </Head>
            <main className="flex w-64 flex-col items-center justify-center gap-8">
                <a
                    className="w-full rounded bg-stone-800 p-5 text-center text-3xl text-stone-100"
                    href="/api/auth/login">
                    Login
                </a>
                <a
                    className="w-full rounded bg-stone-800 p-5 text-center text-3xl text-stone-100"
                    href="/api/auth/logout">
                    Logout
                </a>
            </main>
        </div>
    );
}
I’m using some styling from TailwindCSS here, but the important parts are the two links to /api/auth/login and /api/auth/logout. Here’s what we get:
Back to the front end, we need to set up a Context Provider for our authentication. We can do this in “_app.jsx”:
import { UserProvider } from '@auth0/nextjs-auth0/client';
import type { AppProps } from 'next/app';

export default function MyApp({ Component, pageProps }: AppProps) {
    return (
        <UserProvider>
            <Component {...pageProps} />
        </UserProvider>
    );
}
Next let’s do some refactoring to actually display some information.
We’ll change our page to either show the user profile, or show the login page depending on if there is a user.
export default function Home() {
    const user = useUser();

    return (
        <div className="dark flex min-h-screen w-full items-center justify-center">
            <Head>
                <title>Hello World!</title>
                <link rel="icon" href="/favicon.ico" />
            </Head>
            {user.user ? <Profile /> : <Login />}
        </div>
    );
}
Inside our login page is what we had previously:
function Login() {
    return (
        <main className="flex w-64 flex-col items-center justify-center gap-8">
            <a
                className="w-full rounded bg-stone-800 p-5 text-center text-3xl text-stone-100"
                href="/api/auth/login">
                Login
            </a>
            <a
                className="w-full rounded bg-stone-800 p-5 text-center text-3xl text-stone-100"
                href="/api/auth/logout">
                Logout
            </a>
        </main>
    );
}
And then we can create a new profile page, just to show some of the information we’re getting back about our user:
function Profile() {
const { user, error } = useUser();
if (!user) return null;
return (
<main>
<div className="relative flex h-auto w-64 flex-col items-center justify-center gap-5 p-10 text-center text-3xl">
{user.picture && (
<div className="relative aspect-square w-24">
<Image
src={user.picture}
alt={`Profile picture for ${user.name}`}
className="h-full w-full object-cover"
fill
/>
</div>
)}
<div>{user.name}</div>
<div>{user.email}</div>
<a
className="w-full rounded bg-stone-800 p-5 text-stone-100"
href="/api/auth/logout">
Logout
</a>
</div>
</main>
);
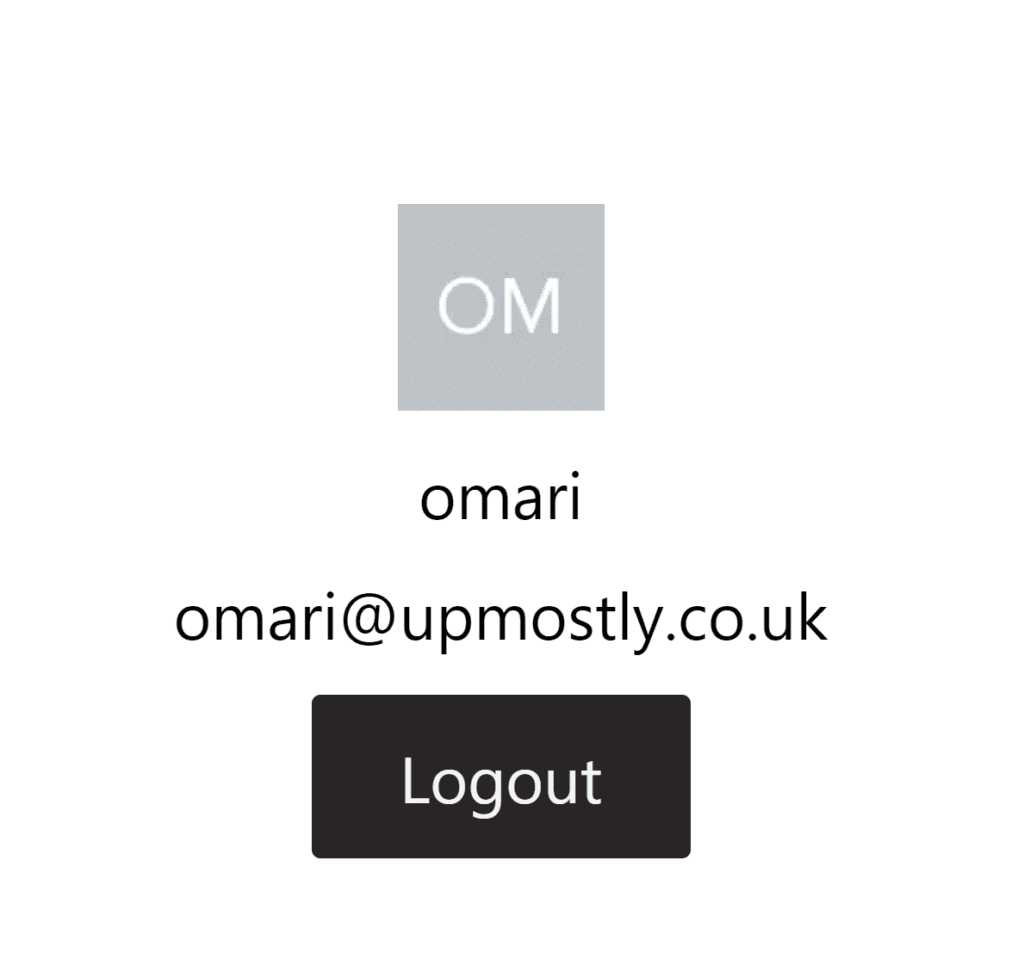
}And here’s what that looks like:
Conclusion
Thanks for following along! Hopefully with the help of this tutorial you were able to get Auth0 set up in your Next.js app. If you enjoyed this article, feel free to leave a comment below!
💬 Leave a comment