AWS Amplify is a cloud development platform that streamlines the deployment of web applications, making it easier for developers to focus on writing code. With AWS Amplify, you can quickly deploy your Next.js app to the cloud and take advantage of its powerful features. In this article, I’ll guide you through the process of deploying your Next.js app using AWS Amplify, giving you the tools you need to get your app up and running quickly and efficiently.
Setting Up
You can very easily deploy an existing app to Amplify, but just in case you’re starting from scratch, you can get started with:
npx create-next-app@latest --typescriptAnd you’ll need to set up the Amplify CLI using:
npm install -g @aws-amplify/cli
amplify configure
The Amplify CLI will talk you through setting up an IAM account to use step by step. You’ll need to set up a user with at least Amplify permissions
Hosting
To get your Next.js app hosted using Amplify, you’ll need to add Amplify to your project. You can do this through:
amplify initWe’ll need to change some settings:
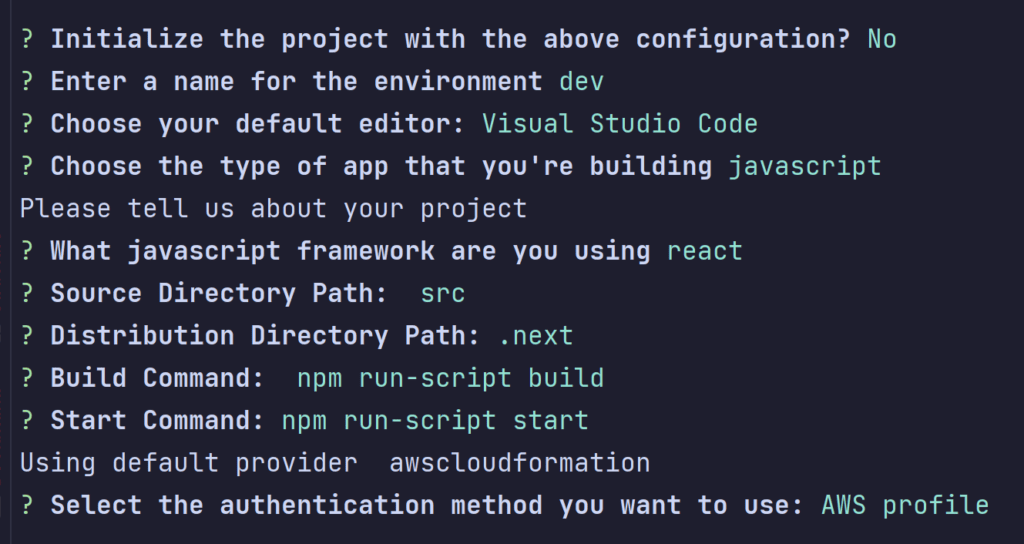
You can customise this to your liking, the important parts are:
- Make sure your distribution directory path is “.next”
- Make sure to select the correct AWS profile for your project
You can then deploy the front-end for your app using:
amplify add hostingWhich will take you to the AWS site in order to connect your GitHub repo:
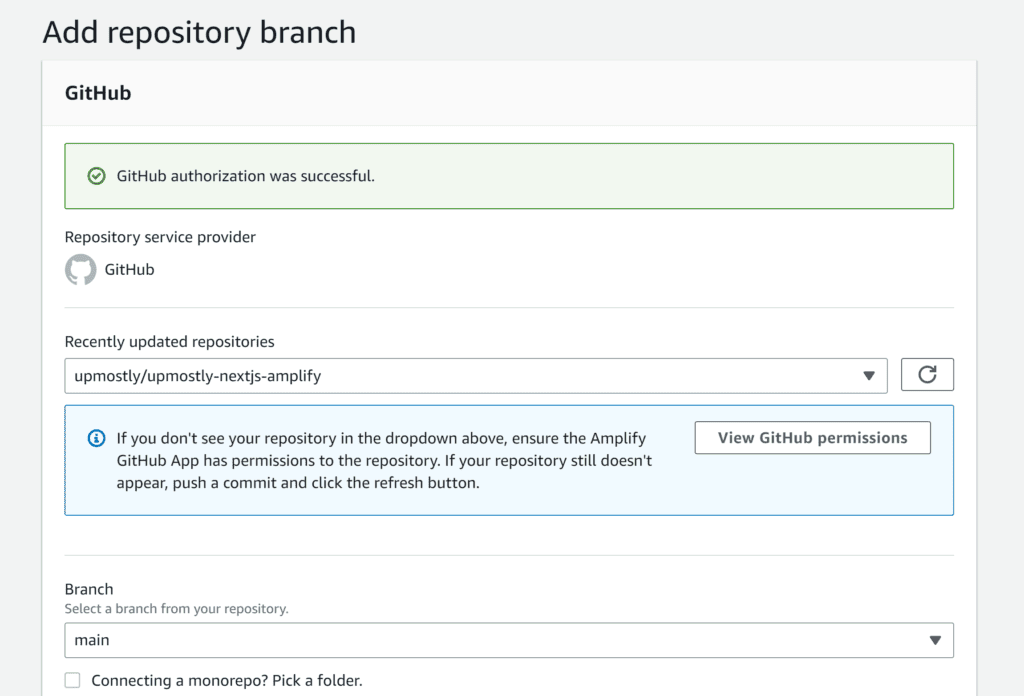
You’ll need to connect your GitHub account to AWS if you haven’t already, in order to be able to select your repo.
Once complete, Amplify make some time to deploy. After a few minutes, however, your Next.js app should be up and running. Here’s the example app I’ve been using up and running:
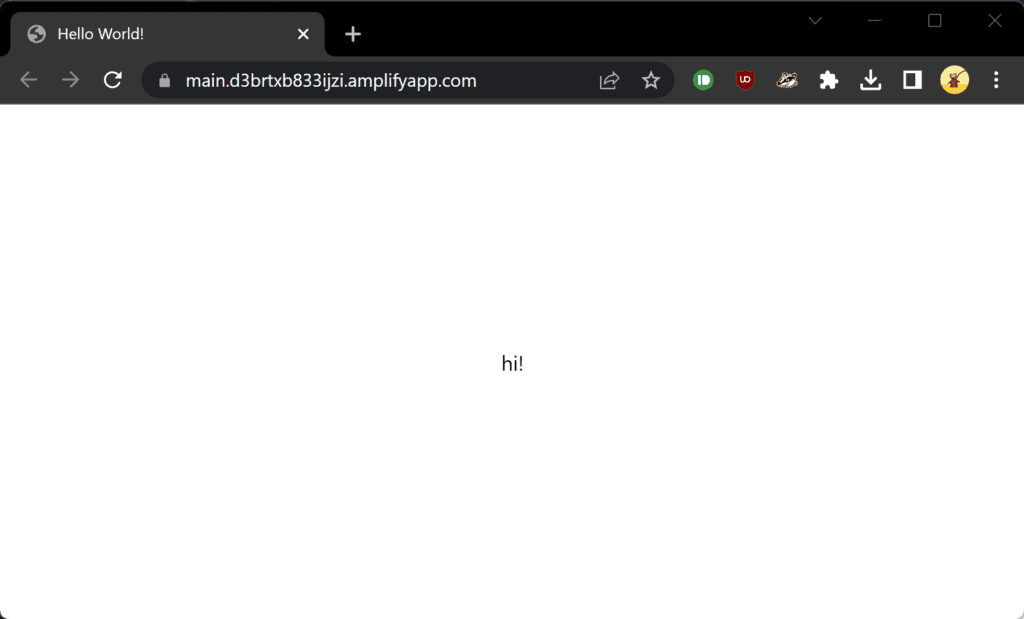
Simple! We have our Next.js app set up and running, with SSR enabled and functional.
API Routes
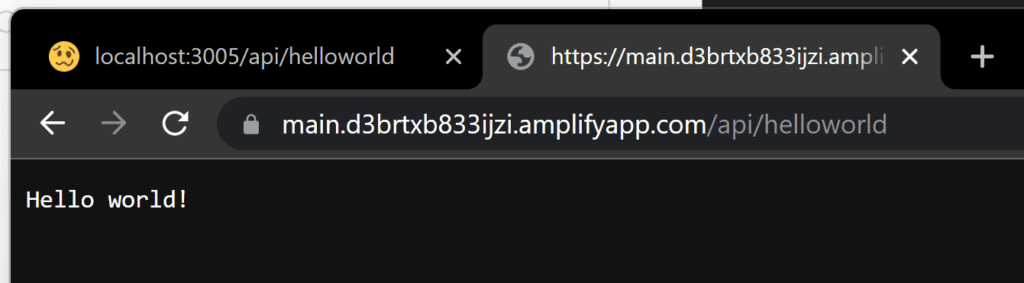
Amplify also supports Next.js API routes, mapping them to /api/. Let’s add in an example Hello World endpoint.
// src/pages/api/helloworld.ts

import type { NextApiRequest, NextApiResponse } from 'next'
export default function handler(req: NextApiRequest, res: NextApiResponse) {
  res.status(200).send('Hello world!');
}
We’ll push up our changes:
git commit -am "Add API route"
git push
And once our site is deployed, we can test the API route:
Conclusion
Hopefully, with the help of this article, you’ve successfully deployed your Next.js app using AWS Amplify. With its streamlined deployment process and powerful features, AWS Amplify makes it easy to get your app up and running in the cloud. By following the steps outlined in this article, you’ve gained the knowledge and skills needed to deploy your Next.js app to the cloud with confidence.
If you’ve read this article and want some further reading, why not have a look at deploying your app through GitHub pages for a simpler approach. Or for more AWS reading, check out this article on uploading files to S3.
We hope you found this article helpful and wish you the best of luck with your future web development projects. If you liked this article, feel free to leave a comment below. Thanks for reading!
💬 Leave a comment