Let’s explore the React useContext Hook by building a music player! I’ll also show you how a custom React Hook can make the useContext Hook easier to use.
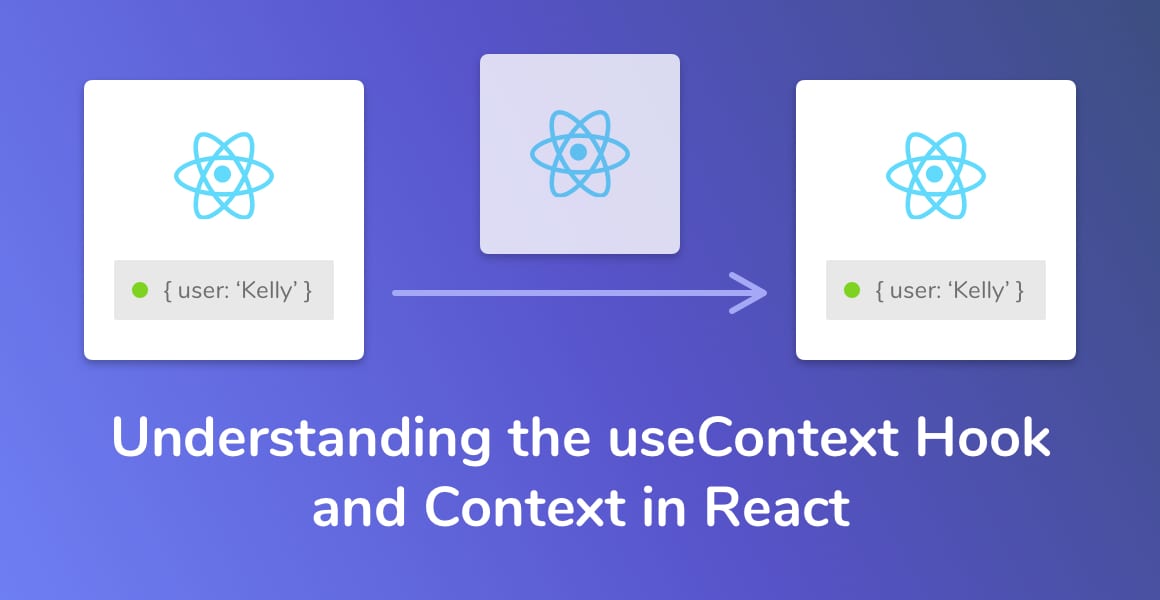
Before we jump into our code editor, let’s understand the React Context API a little more, and how the useContext Hook helps simplify sharing data with multiple React components.
What is React Context?
Imagine for a moment that you have a React app with a single parent component that contains many levels of child components inside of it.
Now, imagine passing data from the uppermost component all the way down to the last child component.
In React data is passed top-down from one component to another through props.
You’d have to pass that data through each and every component, through their props, until you reach the last child component.
That’s painstaking, tiresome, and prone to errors. This is where Context comes to the rescue.
The React Context API allows you to easily access data at different levels of the component tree, without having to pass data down through props.
I recommend skimming through the official React documentation on Context before continuing.
How Does the useContext Hook Work?
The useContext Hook provides all the same functionality you’d expect from the Context API, just packaged up into a simple to use Hook that you can use inside functional components.
Let’s compare the difference between using Context inside of a Class component to using it inside of a functional component with the useContext Hook.
The example below shows Context being used in a Class component:
import AppContext from './appContext.js';

class Example extends React.Component {
  static context = AppContext;
  render() {
    let value = this.context;
    ...
  }
}
And below is the same Context object inside of a functional component, using the new useContext Hook:
import AppContext from './appContext.js';

const Example = () => {
  const context = useContext(AppContext);
  return (
    ...
  );
}
A Context provides both a consumer and a provider. When using the useContext Hook in React, you have to remember to pass in the whole context object, not just the consumer or provider.
You create a C
const AppContext = React.createContext({ foo: 'bar' });This AppContext object is what should be passed as an argument into the useContext Hook. Like this:
const context = useContext(AppContext);What We’re Building
Let’s learn how we can use the useContext Hook in React to help us build a simple Spotify clone !
I’m using the Bulma CSS library and FontAwesome in my examples below. I’ve als created a fresh React app using Create React App. You can do the same, or use an existing React project.
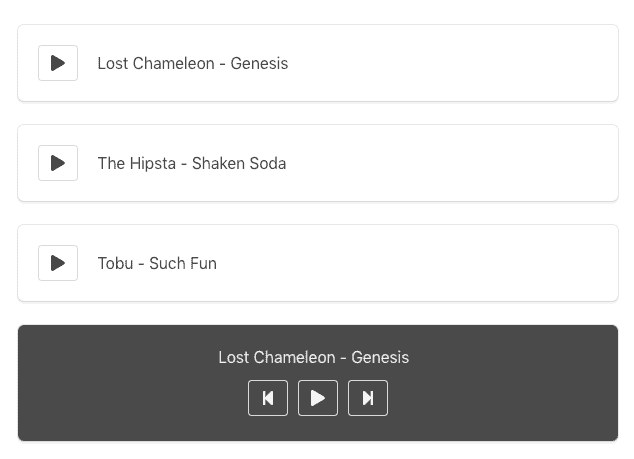
Building a music player is a fantastic example to demonstrate how the useContext Hook works because it has two child components that share the same application state:
- A list of songs with a play/pause button for each.
- A set of player controls for playing/pausing, skipping to the next track, and skipping to the previous track.
Take a look at the screenshot above of what we’re building. The list of songs and the player controls at the bottom both need to know which track is currently playing, and if the track is playing or if it’s paused.
Therefore, we’ll use the React Context API to store this information inside of its state, and then we’ll use the useContext Hook to make it this state available to both components.
Creating the Music Player Context
Create a new file called MusicPlayerContext.js. This will be a React component that acts as a wrapper where we set up the Context, but also return that Context’s Provider for us to wrap our two other components in.
import React from 'react';

const MusicPlayerContext = React.createContext();

const MusicPlayerProvider = (props) => {
  return (
    <MusicPlayerContext.Provider value={}>
      {props.children}
    </MusicPlayerContext.Provider>
  );
}

export { MusicPlayerContext, MusicPlayerProvider };
In the code above, we create a new Context called MusicPlayerContext with no arguments passed inside of the parentheses, indicating that there is no default value for the Context.
We also define a new React component called MusicPlayerProvider that returns the MusicPlayerContext’s Provider, again, with no initial value.
The MusicPlayerContext.Provider is what allows child components to access the Context’s value. It provides the Context object for other components to consume.
Finally, we export both the MusicPlayerContext Context and MusicPlayerProvider component. I’ll show you why we’re exporting both the Context as well as the functional component very soon.
Creating a Stateful Context
Our Context doesn’t have a value yet. Rather than giving it a static value, we want to give it the ability to change its
For this, we’ll use the useState Hook.
import React, { useState } from 'react';

const MusicPlayerContext = React.createContext([{}, () => {}]);

const MusicPlayerProvider = (props) => {
  const [state, setState] = useState({});
  return (
    <MusicPlayerContext.Provider value={[state, setState]}>
      {props.children}
    </MusicPlayerContext.Provider>
  );
}

export { MusicPlayerContext, MusicPlayerProvider };
Let’s walk through the code above.
const MusicPlayerContext = React.createContext([{}, () => {}]);This line creates the Context, as before, but this time we’re passing in an array with two values: an empty object, and an empty function, as the initial value. You’ll see why in just a second.
const [state, setState] = useState({});Here, we use the useState Hook to provide us state. We’re storing multiple values inside of this state, so we name the first variable
<MusicPlayerContext.Provider value={[state, setState]}>
  {props.children}
</MusicPlayerContext.Provider>
Finally, here we put the state object and the setter function into an array, and pass that into our Context Provider’s value. This is why we passed in an array with an empty object and an empty function when creating the Context.
All we need to do to access the Context’s state is import it into a component and use the useContext Hook in React!
import { MusicPlayerContext } from "./MusicPlayerContext";

...

const [state, setState] = useContext(MusicPlayerContext);
How great is that?!
Updating the Context’s State
Let’s take our new stateful Context for a spin!
Jump over to App.js and import the new MusicPlayerProvider component. Then, wrap it around a new component called TrackList.
import React from 'react';

import TrackList from "./TrackList";
import { MusicPlayerProvider } from "./MusicPlayerContext";

const App = () => {
  return (
    <MusicPlayerProvider>
      <div className="container">
        <TrackList />
      </div>
    </MusicPlayerProvider>
  );
}

export default App;
You’ll have to create a new file for the TrackList component.
Once you do, jump inside of TrackList.js and import the MusicPlayerContext. Remember, because we’re exporting two values from MusicPlayerContext, you need to use a named import.
To test that our Context state updates, let’s add a simple button with an onClick that calls setState in our Context. We’ll use the useContext Hook to make this available to us, like so:
import React, { useContext } from "react"

import { MusicPlayerContext } from "./MusicPlayerContext";

const TrackList = () => {
  const [state, setState] = useContext(MusicPlayerContext);
  return (
    <button onClick={() => setState(state => ({ ...state, name: 'Clicked!' }))}>
      {state.name}
    </button>
  )
}

export default TrackList
If you’ve explored the useState Hook in React before, you may have noticed something different about the setState function above…
setState(state => ({ ...state, name: 'clicked!' }))- We’re not using a useState Hook for each value we want to store in
state . Instead, we use a single state object and update the key/value pairs. - Because we use a single state object, we have to pass the existing state object into the new object while we update it,
otherwise the whole object will be overwritten. That’s what the …state syntax does.
Go ahead and save the file, jump over to your running React app and click the button. You should see the button label change to read Clicked!
Displaying a List of Tracks from the Context State
Our TrackList React component is looking a little empty. Why don’t we pass in some initial song titles to our Context?
Open up MusicPlayerContext, find where we’re initializing the state object with the useState Hook, and add an array of tracks to the initial value:
const MusicPlayerProvider = (props) => {
  const [state, setState] = useState({
    tracks: [
      {
        name: 'Lost Chameleon - Genesis',
      },
      {
        name: 'The Hipsta - Shaken Soda',
      },
      {
        name: 'Tobu - Such Fun',
      },
    ],
  });
  return (
    <MusicPlayerContext.Provider value={[state, setState]}>
      {props.children}
    </MusicPlayerContext.Provider>
  );
};
Back in the TrackList component, let’s map over the new tracks array coming from the Context’s state:
import React from "react";

import { MusicPlayerContext } from "./MusicPlayerContext";

const TrackList = () => {
  const [state, setState] = useContext(MusicPlayerContext);
  return (
    <>
      {state.tracks.map(track => (
        <div className="box">
          <div className="song-title">
            {track.name}
          </div>
        </div>
      ))}
    </>
  )
}

export default TrackList
Because tracks is an array, all we need to do to loop over an array in React is use the map function. Each track is an object with a single key called name.
Displaying the track’s name is as easy as putting track.name inside of curly braces inside the map function, like so:
<div className="song-title">
  {track.name}
</div>
Updating Context in React from One Place
We have to import context every time whenever we want to use or update the state from the useContext Hook in our React app.
This is fine for doing simple, one line calls like retrieving and updating the state. However, whenever we introduce additional logic involving the state, our components will become much more complex.
Let me give you an example:
When you click the play button on a track, you first have to check whether that track is currently playing before you start playing it, otherwise, you’ll want to pause that track. If it’s not playing, you set that track to play.
The logic for this example might look something like this:
function playTrack(index) {
  if (index === state.currentTrackIndex) {
    pauseTrack();
  } else {
    setState(state => ({ ...state, currentTrackIndex: index, isPlaying: true }));
  }
}
This logic is likely very common inside of a music player app and will be used by many components.
Therefore, let’s put all of this common logic in one place for all of our components to use!
Say hello to custom React Hooks!
Using a Custom React Hook to Manage Context
Create a new file called useMusicPlayer.js. Because this is a custom React Hook, we use ‘use’ before the name of the Hook.
If you want to learn how custom React Hooks can make your components much leaner, check out my tutorial on Simplifying Forms with Custom React Hooks.
Next, let’s bring in our Context and get access to the state and setState variables using the useContext Hook in our new custom React Hook.
import { useContext } from 'react';
import { MusicPlayerContext } from "./MusicPlayerContext";

const useMusicPlayer = () => {
  const [state, setState] = useContext(MusicPlayerContext);
};

export default useMusicPlayer;
Finally, create a new function, togglePlay which updates an isPlaying value inside of the Context state to true or false, depending on if it’s already playing.
import { useContext } from 'react';
import { MusicPlayerContext } from "./MusicPlayerContext";

const useMusicPlayer = () => {
  const [state, setState] = useContext(MusicPlayerContext);

    function togglePlay() {
      setState(state => ({ ...state, isPlaying: !state.isPlaying }));
    }

    return {
      togglePlay,
    }
};

export default useMusicPlayer;
While we’re here, let’s go ahead and add functions for playing a track, playing the previous track, and playing the next track:
import { useContext } from 'react';
import { MusicPlayerContext } from "./MusicPlayerContext";

const useMusicPlayer = () => {
  const [state, setState] = useContext(MusicPlayerContext);

  // Play a specific track
  function playTrack(index) {
    if (index === state.currentTrackIndex) {
      togglePlay();
    } else {
      setState(state => ({ ...state, currentTrackIndex: index, isPlaying: true }));
    }
  }

  // Toggle play or pause
  function togglePlay() {
    setState(state => ({ ...state, isPlaying: !state.isPlaying }));
  }

  // Play the previous track in the tracks array
  function playPreviousTrack() {
    const newIndex = ((state.currentTrackIndex + -1) % state.tracks.length + state.tracks.length) % state.tracks.length;
    playTrack(newIndex);
  }

  // Play the next track in the tracks array
  function playNextTrack() {
    const newIndex = (state.currentTrackIndex + 1) % state.tracks.length;
    playTrack(newIndex);
  }

  return {
    playTrack,
    togglePlay,
    currentTrackName: state.currentTrackIndex !== null && state.tracks[state.currentTrackIndex].name,
    trackList: state.tracks,
    isPlaying: state.isPlaying,
    playPreviousTrack,
    playNextTrack,
  }
};

export default useMusicPlayer;
Take some time to read through the code above and understand what each of these new functions do.
At the end of the custom Hook, we’re returning all of the functions plus a few helpful variables.
Variables like
return {
  playTrack,
  togglePlay,
  currentTrackName: state.currentTrackIndex !== null && state.tracks[state.currentTrackIndex].name,
  trackList: state.tracks,
  isPlaying: state.isPlaying,
  playPreviousTrack,
  playNextTrack,
}
Playing a Track from the TrackList Component
Now that we have all of these useful functions in the useMusicPlayer custom React Hook, let’s modify the TrackList component slightly:
import React from "react";

import {FontAwesomeIcon} from "@fortawesome/react-fontawesome";
import {faPlay, faPause} from "@fortawesome/free-solid-svg-icons";

import useMusicPlayer from "./useMusicPlayer";

const TrackList = () => {
  const { trackList, currentTrackName, playTrack, isPlaying } = useMusicPlayer();
  return (
    <>
      {trackList.map((track, index) => (
        <div className="box">
          <button className="button" onClick={() => playTrack(index)}>
            {currentTrackName === track.name && isPlaying ? <FontAwesomeIcon icon={faPause} /> : <FontAwesomeIcon icon={faPlay} />}
          </button>
          <div className="song-title">
            {track.name}
          </div>
        </div>
      ))}
    </>
  )
}

export default TrackList
Rather than importing the Context directly in our component, we’re utilizing the useMusicPlayer Hook’s helper functions to interact with the Context state.
That means our React components are much leaner because we can simply call those functions from event handlers, like so:
<button className="button" onClick={() => playTrack(index)}>Setting up the Player Controls
Onto the next React component, the music player controls!
Create a new component called PlayerControls.js and add the following code to it:
import React from "react"

import {FontAwesomeIcon} from "@fortawesome/react-fontawesome";
import {faPause, faPlay, faStepBackward, faStepForward} from "@fortawesome/free-solid-svg-icons";

import useMusicPlayer from "./useMusicPlayer";

const Controls = () => {
  const { isPlaying, currentTrackName, togglePlay, playPreviousTrack, playNextTrack } = useMusicPlayer();
  return (
    <>
      <div className="box controls has-background-grey-dark">
        <div className="current-track has-text-light">
          <marquee>{currentTrackName}</marquee>
        </div>
        <div>
          <button className="button has-text-light has-background-grey-dark" onClick={playPreviousTrack} disabled={!currentTrackName}>
            <FontAwesomeIcon icon={faStepBackward} />
          </button>
          <button className="button has-text-light has-background-grey-dark" onClick={togglePlay} disabled={!currentTrackName}>
            {isPlaying ? <FontAwesomeIcon icon={faPause} /> : <FontAwesomeIcon icon={faPlay} />}
          </button>
          <button className="button has-text-light has-background-grey-dark" onClick={playNextTrack} disabled={!currentTrackName}>
            <FontAwesomeIcon icon={faStepForward} />
          </button>
        </div>
      </div>
    </>
  )
}

export default Controls
Did you notice the similarities between this component and the previous one
We’re importing the
Finally, jump over to App.js and make sure you’re importing these new child components and wrapping them within the MusicPlayerProvider. If they’re not wrapped in the Context provider, they won’t be able to access the Context’s state!
import React from 'react';
import TrackList from "./TrackList";
import PlayerControls from "./PlayerControls";
import { MusicPlayerProvider } from "./MusicPlayerContext";

function App() {
  return (
    <MusicPlayerProvider>
      <div className="container">
        <TrackList />
        <PlayerControls />
      </div>
    </MusicPlayerProvider>
  );
}

export default App;
And last but not least, make sure that you’ve added default values to the Context state, inside of MusicPlayerContext.js:
...

const [state, setState] = useState({
  tracks: [
    {
      name: 'Lost Chameleon - Genesis',
    },
    {
      name: 'The Hipsta - Shaken Soda',
    },
    {
      name: 'Tobu - Such Fun',
    },
  ],
  currentTrackIndex: null,
  isPlaying: false,
});

...
Making Music with new Audio()
If you jump over to your running React app, you’ll notice that there’s one thing missing….. there’s no sound!
That’s because we’re not playing any! To do that, need some audio files to play. There’s plenty of places to find free audio files online, just Google around.
Grab one or two .mp3 files and come back here when you’ve found them. Bensound.com offers a nice, if a little cheesy, selection of royalty free music.
Drop the .mp3 files into your project’s /src folder.
Now, we need to modify MusicPlayerContext to instantiate a new Audio() object, and import our new audio files:
...

import LostChameleon from './LostChameleon.mp3';
import Rock from './TheHipsta.mp3';
import Tobu from './Tobu.mp3';

const MusicPlayerProvider = (props) => {
  const [state, setState] = useState({
    audioPlayer: new Audio(),
    tracks: [
      {
        name: 'Lost Chameleon - Genesis',
        file: LostChameleon,
      },
      {
        name: 'The Hipsta - Shaken Soda',
        file: Rock,
      },
      {
        name: 'Tobu - Such Fun',
        file: Tobu,
      },
    ],
    ...
  });
  ...
};

...
We’ve got a single Audio object that’s stored in the Context state to play audio from. Thanks to the useContext Hook in React, it’s also super easy to access it in our custom Hook, just like before!
All that’s left is to change our custom React Hook, useMusicPlayer, to interact with the Audio object:
...

function playTrack(index) {
  if (index === state.currentTrackIndex) {
    togglePlay();
  } else {
    state.audioPlayer.pause();
    state.audioPlayer = new Audio(state.tracks[index].file);
    state.audioPlayer.play();
    setState(state => ({ ...state, currentTrackIndex: index, isPlaying: true }));
  }
}

function togglePlay() {
  if (state.isPlaying) {
    state.audioPlayer.pause();
  } else {
    state.audioPlayer.play();
  }
  setState(state => ({ ...state, isPlaying: !state.isPlaying }));
}

...
Wrapping Up
So there you have it. After reading this tutorial, you’ll have learned:
- The benefits of using React Context in long component trees.
- How to create a new Context in React using React.createContext.
- How to use the useContext Hook in React to give us access to the closest Context object in our functional components.
- When to add
state to a Context, and how easy it is to retrieve and update the state. - The benefits of abstracting out common logic into a custom React Hook.
- How to play using the Audio() object.
Phew! We covered so much in a single tutorial. I hope all enjoyed reading it as much as I did writing it.
As always, please leave a comment below if you have a question, issue, or if you enjoyed the read!
💬 Leave a comment