
Use custom React Hooks to build forms that require half the code to write, are reusable, and are much easier to read. Read on to learn more!
What We’re Building
Forms are always mistaken as something that’s easy to build. Think about it, we use forms every single day when we use web apps, from login-forms to search boxes.
Therefore, because forms are so prevalent, what could be so hard about dropping a simple form into a page?
Us. Human-beings.
Humans are notoriously bad at using forms. Give us a register page and we’ll find a way to break it and end up blaming the website developer.
Forms require validation rules, formatting, accessibility options, the perfect layout, and complete browser support.
That’s a lot for developers to handle. It’s not unheard of for a simple form to use an insane amount of code behind it.
Setting up the React App
If you have an existing React app, you can skip this section and go straight to Building the Login Form.
Start by opening a new terminal window and moving (cd’ing) to a directory of your choice. Next, we’re going to use the fantastic Create React App toolset to spin up an empty React project.
Type this in your terminal and hit return:
npx create-react-app react-hooks-formFollow the instructions in the Create React App Github repository. We can move on once you have your brand-new empty React project running in your browser.
I’m using the Bulma CSS library in this tutorial. You don’t have to though, as it’s only used for styling the Form component.
To install Bulma, type the following into your terminal and hit return:
npm install --save bulmaBefore we start throwing React Hooks at forms, we should first do some spring cleaning. (I always do this whenever I spin up a new React project using Create React App).
Open up App.js. Delete everything inside it apart from the outer div tag inside the App function, every import apart from the main React import.
It’ll look something like this:
import React from 'react';

const App = () => {
  return (
    <div className="App">

    </div>
  );
};

export default App;
If you want to use Bulma, we need to import it in index.js.
import React from 'react';
import ReactDOM from 'react-dom';
import './index.css';
import App from './App';
import * as serviceWorker from './serviceWorker';

// Importing the Bulma CSS library
import 'bulma/css/bulma.css';

ReactDOM.render(<App />, document.getElementById('root'));

// If you want your app to work offline and load faster, you can change
// unregister() to register() below. Note this comes with some pitfalls.
// Learn more about service workers: http://bit.ly/CRA-PWA
serviceWorker.unregister();
Building the Form Component
We need to build our Form component before we start creating React Hooks to handle forms events.
Create a new file under the src directory. Call it Form.js.
Type the following code into Form.js:
import React from 'react';

const Form = () => {
  return (
    <div className="section is-fullheight">
      <div className="container">
        <div className="column is-4 is-offset-4">
          <div className="box">
            <form>
              <div className="field">
                <label className="label">Email Address</label>
                <div className="control">
                  <input className="input" type="email" name="email" required />
                </div>
              </div>
              <div className="field">
                <label className="label">Password</label>
                <div className="control">
                  <input className="input" type="password" name="password" required />
                </div>
              </div>
              <button type="submit" className="button is-block is-info is-fullwidth">Login</button>
            </form>
          </div>
        </div>
      </div>
    </div>
  );
};

export default Form;
We haven’t hooked up any of the form onSubmit or input onChange event handlers yet because we want to get a working form in HTML first.
Save Form.js. Jump back to App.js and import Form at the top of the file. Finally, add the <Form /> component to the render function of App.
import React from 'react';
import Form from './Form';

const App = () => {
  return (
    <div className="App">
      <Form />
    </div>
  );
};

export default App;
Save App.js. Let’s make sure our Form component works. Hop over to the running React app in your browser and you should see a nice looking login form.
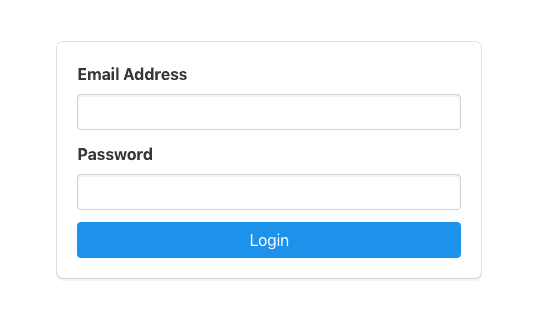
Great! Now the magic begins! ✨
Creating the Custom React Hooks Forms Handler
If you haven’t explored React Hooks yet, check out our Simple Introduction to React Hooks
Forms have two main types of event handlers:
- onSubmit – handles the form submission.
- onChange – handles changing any of the form input values.
Every form has these event handlers, so let’s write a custom React Hook to handle our forms event handlers. It’s the perfect use case!
Create a new file called useForm.js. Custom React Hooks use a special naming convention of putting ‘use’
Add the code below inside useForm.js:
import { useState } from 'react';

const useForm = (callback) => {

  const [values, setValues] = useState({});

  const handleSubmit = (event) => {
    if (event) event.preventDefault();
      callback();
  };

  const handleChange = (event) => {
    event.persist();
    setValues(values => ({ ...values, [event.target.name]: event.target.value }));
  };

  return {
    handleChange,
    handleSubmit,
    values,
  }
};

export default useForm;
We’re doing quite a lot above:
- We import the useState Hook from React to keep track of the form values.
- Next we create a new function called useForm, which takes one parameter, callback. Callback is the function that’s passed into the custom Hook from the component. It gets called whenever the form submits.
- We’re setting up one state variable and one setter function called values and setValues.
- Then we create a function called handleSubmit which takes an event. It prevents the default action of that event (refreshing the page after the event has been called). Afterwards, it just calls callback();
- We create a function called handleChange which also takes an event.
- Finally, we return handleChange, handleSubmit and values from the custom Hook so our component has access to them.
Connecting the Form Component to the Custom useForm Hook.
For the custom React Hooks forms handler to work, we need to actually import it into the Form.js file.
Open up Form.js and import the custom hook at the top. Then, initialize it underneath the function declaration:
...

import useForm from "./useForm";

const Form = () => {
  const { values, handleChange, handleSubmit } = useForm();

...
We’re destructuring the object that’s returned from our useForm custom React Hook so we can use values, handleChange, and handleSubmit.
Now, all that’s left for us to do is use these inside of our form HTML element.
Add an onSubmit attribute to the form HTML element, and call handleSubmit:
...

<form onSubmit={handleSubmit}>

...
Now find the email input and add an onChange and value attribute to it:
<input className="input" type="email" name="email" onChange={handleChange} value={values.email} required />Do the same for the password input element:
<input className="input" type="password" name="password" onChange={handleChange} value={values.password} required />We’re not done yet!
The last thing we need to do is add a login function to the Form component and pass this into the useForm custom Hook as the callback parameter.
...

const { values, handleChange, handleSubmit } = useForm(login);

function login() {
  console.log(values);
}

...
Your final Form.js component that uses React Hooks for forms event handling should look like this:
import React from 'react';
import useForm from "./useForm";

const Form = () => {
  const { values, handleChange, handleSubmit } = useForm(login);

  function login() {
    console.log(values);
  }

  return (
    <div className="section is-fullheight">
      <div className="container">
        <div className="column is-4 is-offset-4">
          <div className="box">
            <form onSubmit={handleSubmit}>
              <div className="field">
                <label className="label">Email Address</label>
                <div className="control">
                  <input className="input" type="email" name="email" onChange={handleChange} value={values.email} required />
                </div>
              </div>
              <div className="field">
                <label className="label">Password</label>
                <div className="control">
                  <input className="input" type="password" name="password" onChange={handleChange} value={values.password} required />
                </div>
              </div>
              <button type="submit" className="button is-block is-info is-fullwidth">Login</button>
            </form>
          </div>
        </div>
      </div>
    </div>
  );
};

export default Form;
Save everything, open the app running in your browser and give your new form a spin!
Wrapping Up
Sure, it doesn’t look like much on the front-end, but when you think about how much code you’ve saved yourself by using a custom React Hook for your forms management, it’s staggering!
Here’s the same Form component written as a class Component instead of a functional stateful component.
import React, { Component } from 'react';

class Form extends Component {
  constructor(props) {
    super(props);
    this.state = {
      email: '',
      password: '',
    };
  }

  handleChange(event) {
    this.setState({
      [event.target.name]: event.target.value,
    });
  }

  login() {
    const { email, password } = this.state;
    console.log(`${email}, ${password}`);
  }

  render() {
    const { email, password } = this.state;
    return (
      <div className="section is-fullheight">
        <div className="container">
          <div className="column is-4 is-offset-4">
            <div className="box">
              <form onSubmit={this.login}>
                <div className="field">
                  <label className="label">Email Address</label>
                  <div className="control">
                    <input className="input" type="email" name="email" onChange={this.handleChange} value={email || ''} required />
                  </div>
                </div>
                <div className="field">
                  <label className="label">Password</label>
                  <div className="control">
                    <input className="input" type="password" name="password" onChange={this.handleChange} value={password || ''} required />
                  </div>
                </div>
                <button type="submit" className="button is-block is-info is-fullwidth">Login</button>
              </form>
            </div>
          </div>
        </div>
      </div>
    );
  }
}

export default Form;
Our functional component using React Hooks for our forms is 39 lines of code. The code above is 54. You can learn more about React hooks here and the main differences between React class-based and functional components here.
Plus, our custom React Hooks Forms handler is reusable! You can plug that baby into any number of forms!
As always, if you have any issues or questions, I’d love to hear from you in the comments below.
💬 Leave a comment