Tables are really useful when it comes to presenting large amounts of data to your users. However, it’s not always as easy as it first may seem to build a dynamic table in React. In this article, we will take a quick look at how to create such a table and make it as easy as possible to expand on its size and functionality in the future.
If you’re working on a really simple implementation and do not want to spend much time working on the implementation then you may want to take a look at some existing component libraries out there. They are offering amazing out of the box solutions.
Let’s start by defining the dummy content
import { useState } from 'react'

const INITIAL_STATE = [
  { id: 1, name: 'Tommy', age: 21, hobby: 'coding' },
  { id: 2, name: 'Anna', age: 19, hobby: 'reading' },
  { id: 3, name: 'Bobby', age: 16, hobby: 'swimming' },
  { id: 4, name: 'Lauren', age: 25, hobby: 'running' }
]

function App() {
  const [users, setUsers] = useState(INITIAL_STATE)

  return (
    <div style={{ margin: '50px' }}>
      <h1>Users Table</h1>
    </div>
  );
}

export default App;
I have created the static variable INITIAL_STATE with the initial data that we’ll be rendering in our table. The next step would be to define the headers of our table.
import { useState } from 'react'
const INITIAL_STATE = [
{ id: 1, name: 'Tommy', age: 21, hobby: 'coding' },
{ id: 2, name: 'Anna', age: 19, hobby: 'reading' },
{ id: 3, name: 'Bobby', age: 16, hobby: 'swimming' },
{ id: 4, name: 'Lauren', age: 25, hobby: 'running' }
]
const capitalize = (word) => {
return word[0].toUpperCase() + word.slice(1)
}
function App() {
const [users, setUsers] = useState(INITIAL_STATE)
const renderHeader = () => {
return <tr>
{Object.keys(INITIAL_STATE[0]).map(key => <th>{capitalize(key)}</th>)}
</tr>
}
return (
<div style={{ margin: '50px' }}>
<h1>Users Table</h1>
<table>
{renderHeader()}
</table>
</div>
);
}
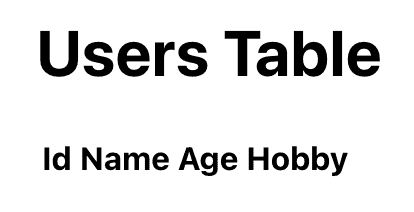
export default App;To accomplish that we have added the HTML tag table to create our table element as well as the helper function called renderHearder. Given that INITIAL_STATE is an array of objects we are making use of the keys of the first object to help us generate the headers dynamically. Finally, we have written the custom function capitalize which capitalizes provided string.
Our application should now look like below
We can now apply the same principle to our users state variable to render the rows of the table.
import { useState } from 'react'

const INITIAL_STATE = [
  { id: 1, name: 'Tommy', age: 21, hobby: 'coding' },
  { id: 2, name: 'Anna', age: 19, hobby: 'reading' },
  { id: 3, name: 'Bobby', age: 16, hobby: 'swimming' },
  { id: 4, name: 'Lauren', age: 25, hobby: 'running' }
]

const capitalize = (word) => {
  return word[0].toUpperCase() + word.slice(1)
}

function App() {
  const [users, setUsers] = useState(INITIAL_STATE)

  const renderUsers = () => {
    return users.map(({ id, name, age, hobby }) => {
      return <tr key={id} >
      <td style={{ padding: '10px', border: '1px solid black' }}>{id}</td>
      <td style={{ padding: '10px', border: '1px solid black' }}>{name}</td>
      <td style={{ padding: '10px', border: '1px solid black' }}>{age}</td>
      <td style={{ padding: '10px', border: '1px solid black' }}>{hobby}</td>
    </tr>
    })
  }

  const renderHeader = () => {
    return <tr>
      {Object.keys(INITIAL_STATE[0]).map(key => <th>{capitalize(key)}</th>)}
    </tr>
  }

  return (
    <div style={{ margin: '50px' }}>
      <h1>Users Table</h1>
      <table>
        {renderHeader()}
        <tbody>
          {renderUsers()}
        </tbody>
      </table>
    </div>
  );
}

export default App;
renderUsers iterates over the state and creates the data rows. We have also added some inline styling to make everything slightly easier to see.
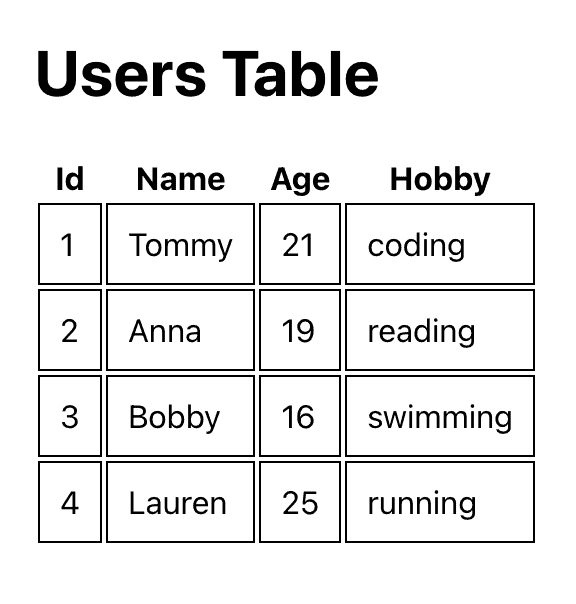
Our table now took its final shape. We can introduce one final code improvement that won’t affect the UI in any way.
import { useState } from 'react'

const INITIAL_STATE = [
  { id: 1, name: 'Tommy', age: 21, hobby: 'coding' },
  { id: 2, name: 'Anna', age: 19, hobby: 'reading' },
  { id: 3, name: 'Bobby', age: 16, hobby: 'swimming' },
  { id: 4, name: 'Lauren', age: 25, hobby: 'running' }
]

const capitalize = (word) => {
  return word[0].toUpperCase() + word.slice(1)
}

function App() {
  const [users, setUsers] = useState(INITIAL_STATE)

  const renderUsers = () => {
    return users.map(({ id, name, age, hobby }) => {
      return <tr key={id} >
      <td style={{ padding: '10px', border: '1px solid black' }}>{id}</td>
      <td style={{ padding: '10px', border: '1px solid black' }}>{name}</td>
      <td style={{ padding: '10px', border: '1px solid black' }}>{age}</td>
      <td style={{ padding: '10px', border: '1px solid black' }}>{hobby}</td>
    </tr>
    })
  }

  const renderHeader = () => {
    return <tr>
      {Object.keys(INITIAL_STATE[0]).map(key => <th>{capitalize(key)}</th>)}
    </tr>
  }

  const renderTable = () => {
    return (
      <table>
        {renderHeader()}
        <tbody>
          {renderUsers()}
        </tbody>
      </table>
    )
  }

  return (
    <div style={{ margin: '50px' }}>
      <h1>Users Table</h1>
      {renderTable()}
    </div>
  );
}

export default App
We added the renderTable function to handle all the logic of rendering our table.
Personally, I’m a big fan of Material UI make sure to check what they have to offer. 90% of the time, you will be better off using their solution rather than building one from scratch.
💬 Leave a comment