PM2 is a Javascript process manager. It’s used to handle automatically managing your application in the background. A common use case for PM2 is deploying a Node.js app on a server. PM2 can help to handle storing configurations for the app, starting your app and handling things such as automatically starting your app with your server, and restarting it automatically if it runs into any issues.
Getting Started
Firstly we need to install pm2:
npm install pm2@latest -gWe’re installing it as a global app here, instead of per-project. Once that’s installed, we need to configure a config file for pm2. In here, you can define any arguments and environment variables for your app. Run the following commands to set up the default config:
cd ~
pm2 init
Then edit your config file, and replace the default setup with this:
module.exports = {
  apps: [
    {
      name: 'next',
      cwd: '/home/<USERNAME>/<PROJECT-FOLDER>',
      script: 'npm',
      args: 'start',
      env: {
        NODE_ENV: 'production',

      },
    },
  ],
};
You can add in any environment variables here as well.
To start your Next.js app, run:
pm2 start ecosystem.config.jsAutomating
A useful next step is configuring pm2 to start automatically with your server/computer. You can do this by running:
pm2 startup systemdThis should give you back a command to copy and execute:
$ command

[PM2] Init System found: systemd
Platform systemd

. . .


[PM2] [v] Command successfully executed.
+---------------------------------------+
[PM2] Freeze a process list on reboot via:
   $ pm2 save

[PM2] Remove init script via:
   $ pm2 unstartup systemd
Then run:
pm2 saveTo save your current process list/preferences.
Now you should have PM2 set up to be able to start your Next.js app, and PM2 should be set up to automatically start with your computer!
Helpful Tips
Managing Your App
To manage the process for your app, you can use the following commands:
pm2 start <app>
pm2 restart <app>
pm2 reload <app>
pm2 stop <app>
pm2 delete <app>

pm2 <command> all # Runs the command for all the processes
There are more commands you can view with “pm2 -h”, but these are the main ones you should need.
Monitoring
You can easily monitor your Next.js app, and any others in your pm2 config using:
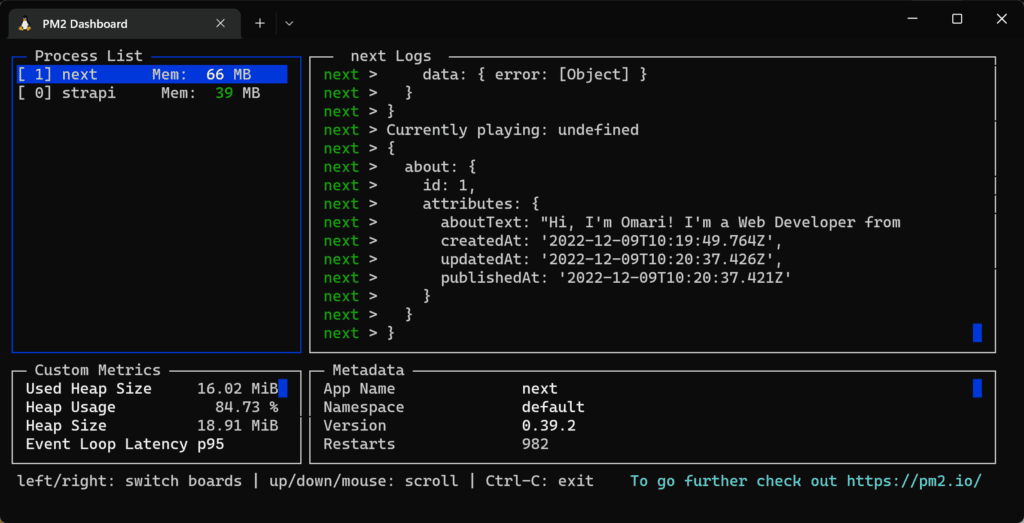
pm2 monitThis will bring up a command line dashboard for you to monitor the status for your app. Here’s a live example that I’m currently using to deploy my personal site:
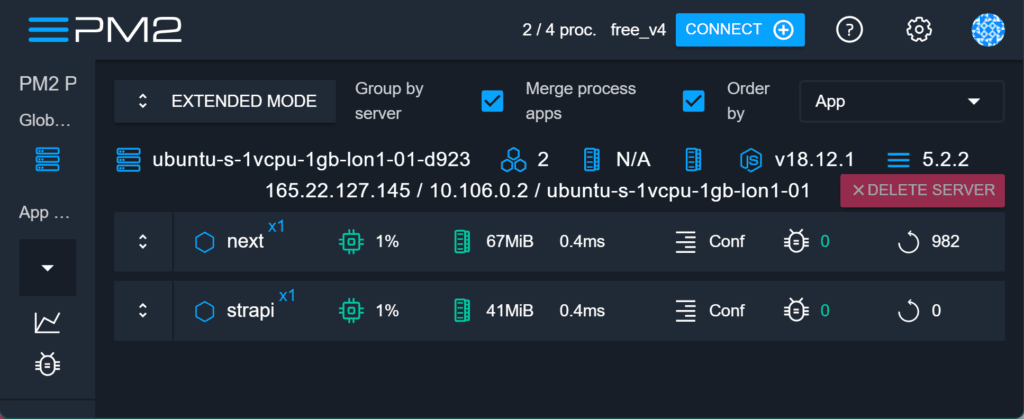
If you prefer a web interface, you can set one up using:
pm2 plusThis will take you through setting up an account, and take you to PM2 Plus, pm2’s web monitoring solution.
Logs
You can see the live logs for your app using one of the monitoring options above, however you can also easily access the actual logs at “/home/<USER>/.pm2/logs”, or using the command:
pm2 logsThere are also some options available with this command:
pm2 logs <app> # Display logs for "app"

pm2 logs --json # Output the logs in json
pm2 logs --err # Output error output
pm2 logs <app> --lines <n> # Limit the output to n lines
Conclusion
That’s all! Hopefully you were able to follow this tutorial, and PM2 should now be set up to manage your Next.js app. I’ve set up a Next.js app in this article, but if you’re using another framework like React or Svelte, you can easily swap out the start commands for your own. If you liked this article, if you had any troubles following along, or if you have any requests, feel free to leave a comment below!
💬 Leave a comment