Material UI (MUI) is fantastic out of the box component library that developers can import into their projects and use. It not only provides us with functionality that’s hard sometimes really hard to code ourselves, like fully customizable tables but also looks great at the same time. We can easily prototype our applications to test some concepts or even build production applications based on them. Let’s take a look at how we can install MUI in our NextJS application.
Installation
Let’s first install the core MUI dependency in our project by executing
$ npm install @material-ui/corein the root directory of our application.
Then we should install the Roboto font. MUI components were designed with the Roboto font in mind, hence it makes sense to use this font before we move any further. To do that execute the below command.
$ npm install @fontsource/robotoIn your index.js file, make sure to import the font by pasting
import '@fontsource/roboto';among the other imports.
Finally, we can install the SVG icons package in case we want to use some icons.
$ npm install @material-ui/iconsAnd that should be it for the setup. We can now try to build a simple application using MUI.
Usage
We can take a look at a simple application example with Buttons. We’re going to render different styles of buttons available in MUI to explore the depth of options available to developers.
import '@fontsource/roboto';
import Button from '@material-ui/core/Button';
export default function Home() {
return (
<div style={{ margin: 50 }}>
<div>
<Button variant="text" color="primary">
Hello World
</Button>
<Button variant="contained" color="primary">
Hello World
</Button>
<Button variant="outlined" color="primary">
Hello World
</Button>
</div>
</div>
)
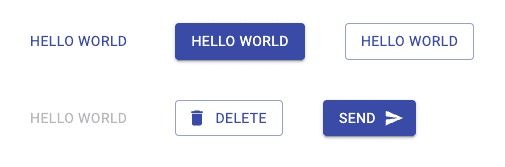
}In the above code snippet, we have imported a Button and used it in the Home component three times. Each time with a different variant. This renders the below output to the page.

Let’s now incorporate some of the SVG icons that we installed previously and use them with our buttons.
import '@fontsource/roboto';
import Button from '@material-ui/core/Button';
import DeleteIcon from "@material-ui/icons//Delete";
import SendIcon from "@material-ui/icons//Send";

export default function Home() {
  return (
    <div style={{ margin: 50 }}>
      <div>
        <Button variant="text" color="primary">
          Hello World
        </Button>
        <Button variant="contained" color="primary">
          Hello World
        </Button>
        <Button variant="outlined" color="primary">
          Hello World
        </Button>
      </div>
      <div>
        <Button
          color="primary"
          disabled
          >
          Hello World
        </Button>
        <Button
          variant="outlined"
          color="primary"
          startIcon={<DeleteIcon />}
        >
          Delete
        </Button>
        <Button
          variant="contained"
          color="primary"
          endIcon={<SendIcon />}
        >
          Send
        </Button>
      </div>
    </div>
  )
}
Notice that Button accepts props for startIcon and endIcon. We’re making use of those to add some more visual helps for the users to express better what the buttons will do.
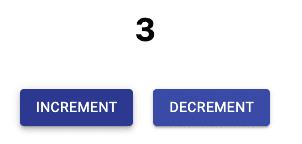
Counter
Below you can find a code snippet for a classic counter example implemented using MUI in NextJS.
import '@fontsource/roboto';
import Button from '@material-ui/core/Button';
import { useState } from 'react';

export default function Home() {
  const [counter, setCounter] = useState(0)
  return (
    <div style={{ margin: 50 }}>
      <h1>{counter}</h1>
      <Button onClick={() => setCounter(counter + 1)} color="primary" variant='contained'>Increment</Button>
      <Button onClick={() => setCounter(counter - 1)} color="primary" variant='contained'>Decrement</Button>
    </div>
  )
}
💬 Leave a comment