Next.js is a popular React-based framework that enables server-side rendering, automatic code splitting, and simpler client-side routing. In this article, we’ll discuss how to send data from one component to another in Next.js.
There are a few approaches you might take to passing data between components. In this article we’ll go through:
- Using props
- Using the Context API
Props
One of the most common ways to pass data between components in React is by using props. In Next.js, you can pass props between components just like in React. To pass data from a parent component to a child component, you can simply add the data as a prop on the child component. For example:
export default function SendData() {
    return (
        <section className="flex h-screen w-full items-center justify-center">
            <ChildComponent foo="foo" bar="bar" />
        </section>
    );
}

function ChildComponent(props) {
    return <div>{JSON.stringify(props)}</div>;
}
(You might notice some built-in props here, e.g. the className prop, which I’m using to provide some styling thanks to TailwindCSS)
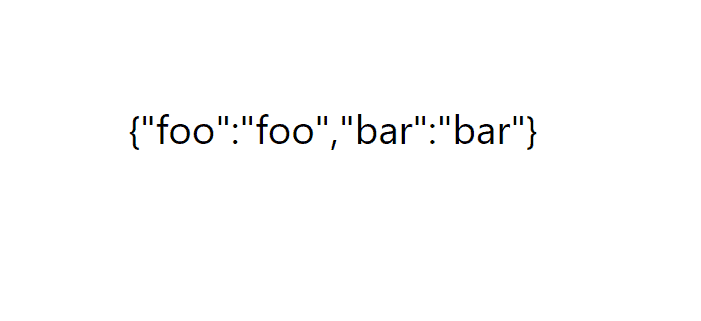
We receive props as one object, which we can see by checking what our component displays:
One pattern you might see a lot is destructuring to directly get the values out of this object:
function ChildComponent({ foo, bar }) {
    return (
        <div>
            First Prop: {foo} Second Prop: {bar}
        </div>
    );
}
And if you’re using TypeScript in your Next.js project, you’ll have to give a type to your props object:
type ChildComponentProps = { foo: string; bar: string };

function ChildComponent({ foo, bar }: ChildComponentProps) {
    return (
        <div>
            First Prop: {foo} Second Prop: {bar}
        </div>
    );
}
Context
Context is another way of passing data, that allows you to pass data down the component tree without having to pass props manually at every level. For a more in-depth guide to Context in Next.js, check out this article. To use context, you first need to create a context object:
const MyContext = createContext<string>('Default Value');
And then set up a context provider in your parent component:
export default function SendData() {
    return (
        <MyContext.Provider value="Hello world!">
            <section className="flex h-screen w-full items-center justify-center">
                <ChildComponent />
            </section>
        </MyContext.Provider>
    );
}
Then any child of this provider can access the value using the useContext hook:
function ChildComponent() {
    const message = useContext(MyContext);
    return <div>{message}</div>;
}
And our message gets displayed:

There’s a little more setup involved, but the benefit of the context approach is to avoid prop drilling, i.e. having to pass props through many levels of components.
Example
Let’s use both of the techniques we’ve just learnt to create a simple gallery component, which we’ll use to display some data from the PokeAPI
First we’ll set up our context. In context I’m going to be storing the functions to load more pokemon, or remove pokemon from our gallery.
const PokemonControlsContext = createContext<[() => void, () => void]>([
    () => console.log('No add pokemon function provided'),
    () => console.log('No remove pokemon function provided'),
]);

function usePokemonControlsContext() {
    return useContext(PokemonControlsContext)
}
I’ve set this up with default values, which are functions that don’t do anything.
Then I have a PokemonCard component, to display data about a single Pokemon:
function PokemonCard({ name, sprite, types }: Pokemon) {
    return (
        <div className="flex flex-col items-center justify-center rounded bg-stone-800 p-10 shadow-2xl">
            <h1 className="text-6xl font-bold capitalize">{name}</h1>
            <Image
                src={sprite}
                alt={`${name} sprite`}
                width={300}
                height={300}
            />
            <div className="text-4xl capitalize">{`${types[0].type.name}${
                types.length > 1 ? '/' + types[1].type.name : ''
            }`}</div>
        </div>
    );
}
We’re getting all our data about the single pokemon through props, which will be passed through in our parent component.
The final piece we need is some buttons to add and remove pokemon:
function AddPokemon() {
    const [add] = usePokemonControlsContext();
    return (
        <button
            className="flex items-center justify-center rounded bg-white p-4 text-xl text-stone-800"
            onClick={() => add()}>
            <FaPlus />
        </button>
    );
}

function RemovePokemon() {
    const [, remove] = usePokemonControlsContext();
    return (
        <button
            className="flex items-center justify-center rounded bg-white p-4 text-xl text-stone-800"
            onClick={() => remove()}>
            <FaMinus />
        </button>
    );
}

function Controls() {
    return (
        <div className="flex flex-col gap-8">
            <AddPokemon />
            <RemovePokemon />
        </div>
    );
}
Thanks to our context, these buttons don’t need any props, they can easily access the functions they need from context.
Then we’ll set up our page component:
export default function SendData() {
    const [pokemon, setPokemon] = useState<Pokemon[]>([]);

    const addPokemon = () => {
        const { id } = pokemon[pokemon.length - 1];
        fetchPokemon(id + 1).then((p) => {
            setPokemon((oldPokemon) => [...oldPokemon, p]);
        });
    };

    const removePokemon = () => {
        setPokemon((oldPokemon) => {
            const newArr = [...oldPokemon];
            newArr.pop();
            return newArr;
        });
    };

    return (
        <PageWrapper>
            <div className="grid auto-rows-auto grid-cols-3 gap-12">
                {pokemon.map((p) => (
                    <PokemonCard key={p.name} {...p} />
                ))}
            </div>

        </PageWrapper>
    );
}
We have two functions for loading a new Pokemon, or removing our last one.
And the final part is to put this all together in our page component:
export default function SendData() {
    const [pokemon, setPokemon] = useState<Pokemon[]>([]);

    const addPokemon = () => {
        const lastPokemon = pokemon[pokemon.length - 1];
        const id = lastPokemon ? lastPokemon.id : 1;
        fetchPokemon(id + 1).then((p) => {
            setPokemon((oldPokemon) => [...oldPokemon, p]);
        });
    };

    const removePokemon = () => {
        setPokemon((oldPokemon) => {
            const newArr = [...oldPokemon];
            newArr.pop();
            return newArr;
        });
    };

    return (
        <PageWrapper>
            <PokemonControlsContext.Provider
                value={[addPokemon, removePokemon]}>
                <div className="grid auto-rows-auto grid-cols-3 gap-12">
                    {pokemon.map((p) => (
                        <PokemonCard key={p.name} {...p} />
                    ))}
                </div>
                <Controls />
            </PokemonControlsContext.Provider>
        </PageWrapper>
    );
}
Firstly we’re storing our list of Pokemon in state. Then we have some helper functions to retrieve/remove Pokemon from the list.
These get passed to our context provider, which means that the Controls component can now access those values. To display our Pokemon data, we’re just mapping over that array, and passing each Pokemon as props.
I’ve used a little shortcut here. Since the variable p perfectly matches all the props we want, instead of doing:
                 <PokemonCard
                            key={p.name}
                            name={p.name}
                            id={p.id}
                            types={p.types}
                            sprite={p.sprite}
                        />
We can use the spread operator to just pass in the object.
It’s essentially the same as the difference between:
const props: Pokemon = { id: p.id, name: p.name, sprite: p.sprite, types: p.types }
PokemonCard(props);

// vs
const props: Pokemon = {...p}
PokemonCard(p);
And here’s what we get for our end result:

Conclusion
Thanks for reading! I hope this article has been helpful to you. By implementing the techniques and strategies we’ve covered, hopefully you can create dynamic and responsive web applications that deliver a seamless user experience. Which approach you want to use is up to you. I’d recommend starting off with props, and switching to the Context API if you’re finding that you need your data in a lot of places, or if you’re running into prop drilling. If you’re interested in Context, then this article on how to use the Coontext API to manage global state might interest you.
If you have any questions or comments about this article, we’d love to hear from you. Please feel free to leave a comment below!
💬 Leave a comment