Whenever your react app encounters any javascript errors inside any react functional or class component it breaks the entire application which is a bad experience for your end-user. React 16 introduced error boundaries to get rid of this bad experience in your application. With error boundaries you can now gracefully handle and let the user know that something went wrong whenever your application encounters an error.
In this article we will learn how handle these errors by implementing error boundaries and see them in action.
Firstly create a new react application in vs code or any other IDE, I personally prefer VS Code.
What are error boundaries?
Error boundaries are also react components which help you catch errors in components which are wrapped by error boundaries and display a fallback UI (UI to display whenever an error is caught instead of crashing the application).
Error boundaries can catch:
- Rendering errors
- Lifecycle errors
- Constructer errors
Error boundaries cannot catch:
- Errors in event handlers
- Errors in async code
- Errors in server side rendering
- Errors in error boundaries (Duhh! 🙄🙄)
Implementation of Error Boundaries
To make a class component an error boundary component, you have to just define static getDerivedStateFromError() and componentDidCatch() lifecycle methods.
Lets create a new class component and make it an error boundary, lets roll 🎸🎸
export default class ErrorBoundary extends React.Component {
  constructor(props) {
    super(props);
    this.state = { error: null, errorInfo: null };
  }

  componentDidCatch(error, errorInfo) {
    // use lifecycle to catch errors in any components below and re-render fallback UI
    this.setState({
      error: error,
      errorInfo: errorInfo,
    });
  }

  render() {
    if (this.state.errorInfo) {
      // Fallback UI
      return (
        <div>
          <h2>Something went wrong.</h2>
          <details style={{ whiteSpace: "pre-wrap" }}>
            {this.state.error && this.state.error.toString()}
            <br />
            {this.state.errorInfo.componentStack}
          </details>
        </div>
      );
    }
    // without error render normally in happy flow 😀😀
    return this.props.children;
  }
}
Wrapping Components with Error Boundary
Now we can wrap our entire application with error boundary or maybe wrap our child components to show fallback UI on just that specific components, lets see this in action
// Wrapping child component
<ErrorBoundary>
 <ComponentThatThrowsError />
</ErrorBoundary>
// Wrapping our entire application
<ErrorBoundary>
<App />
</ErrorBoundary>Throw an error
Lets throw an error ourselves in useEffect to see if our error boundary catches or not
const ComponentThatThrowsError = () => {
  const [counter, setCounter] = useState(0);
  useEffect(() => {
    if (counter === 5) {
      throw new Error("Something went wrong");
    }
  }, [counter]);
  return (
    <div>
      <p>Parent Component Counter</p>
      <button
        className="btn"
        onClick={() => {
          setCounter(counter + 1);
        }}
      >
        {counter}
      </button>
    </div>
  );
};
We have thrown an error when the counter value is equal to 5
BOBS YOUR UNCLE 🚀🚀🚀

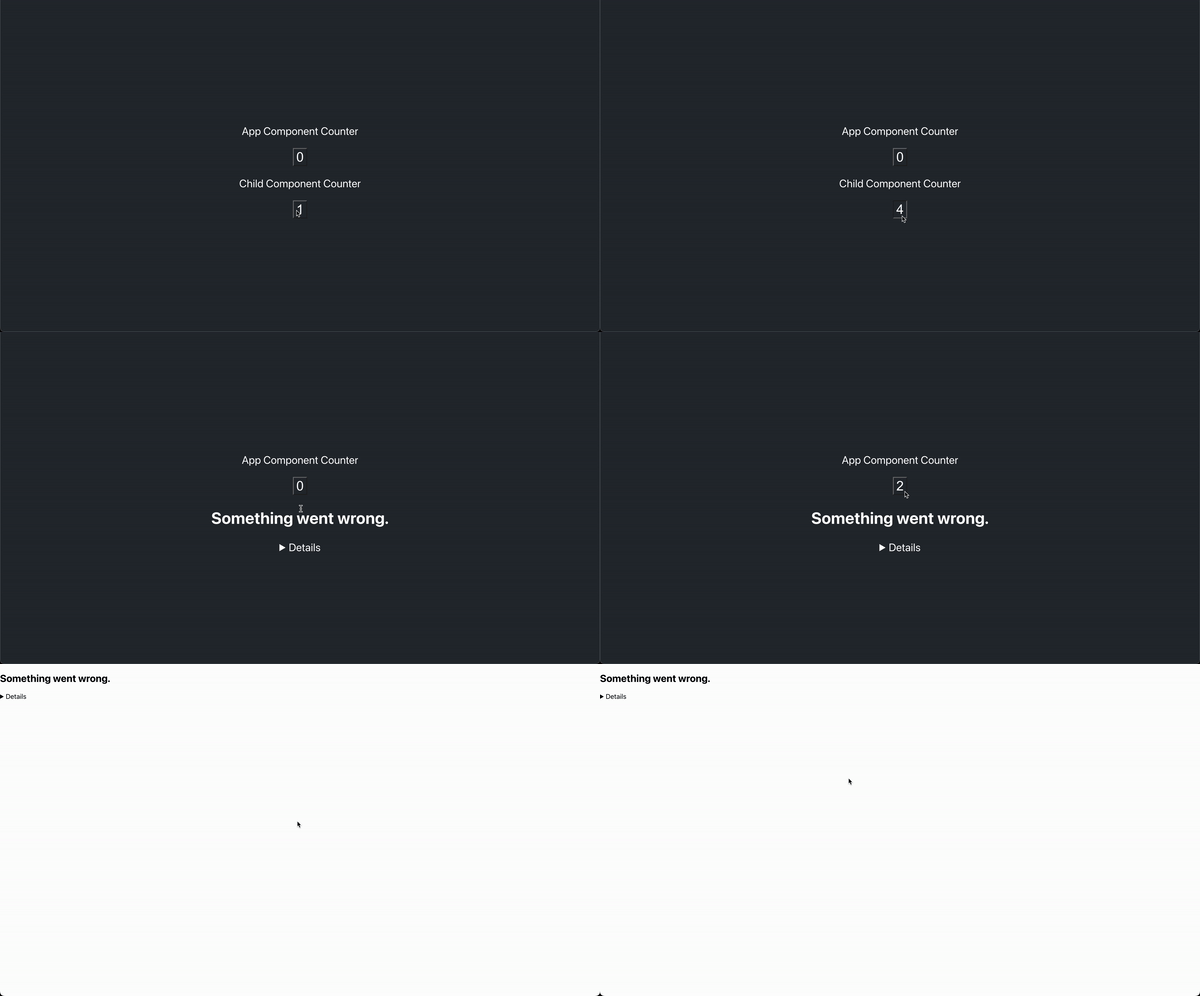
We can see once the child component counter gets to 5 the application renders fallback UI for that component and when the main error boundary catches an error it renders the white screen with something went wrong
Wrap Up
We covered a lot in this one and I hope it was not too much for you. You learned how to create error boundaries along with why and where we use them. How they make the experience of your application better.
Here is a reference to the official documentation
https://reactjs.org/docs/error-boundaries.html
💬 Leave a comment