The best way to learn React is to re-create Hello World but for React. Let’s learn all there is to know about building a simple Hello World app in React!
What We’re Building
This tutorial will thoroughly explain everything there is to know about creating a new React app in the quickest way possible. If you’re someone who wants to learn how to spin up a brand new React app, then this tutorial is for you.
I’ve summarized the most important details for each step under each of the headings so you can spend less reading and more coding.
By the end of this React Hello World tutorial you’ll have a running React app and have learned how to do the following:
- Generate a New React App Using Create React App
- Run the React App
- Understand the Folder Structure
- Install Additional React Libraries
- Create a Hello World React Component
- Use the Hello World React Component
- Wrapping Up
Generate a New React App Using Create React App
- Create React App (CRA) is a tool to create a blank React app using a single terminal command.
- CRA is maintained by the core React team.
Configuring a modern React app from scratch can be quite intricate, and requires a fair amount of research and tinkering with build tools such as Webpack, or compilers like Babel.
Who has time for that? It’s 2021, so we want to spend more time coding and less time configuring!
Therefore, the best way to do that in the React world is to use the absolutely fantastic Create React App tool.
Open up your terminal and run the following command:
npx create-react-app hello-worldThis generates all of the files, folders, and libraries we need, as well as automatically configuring all of the pieces together so that we can jump right into writing React components!
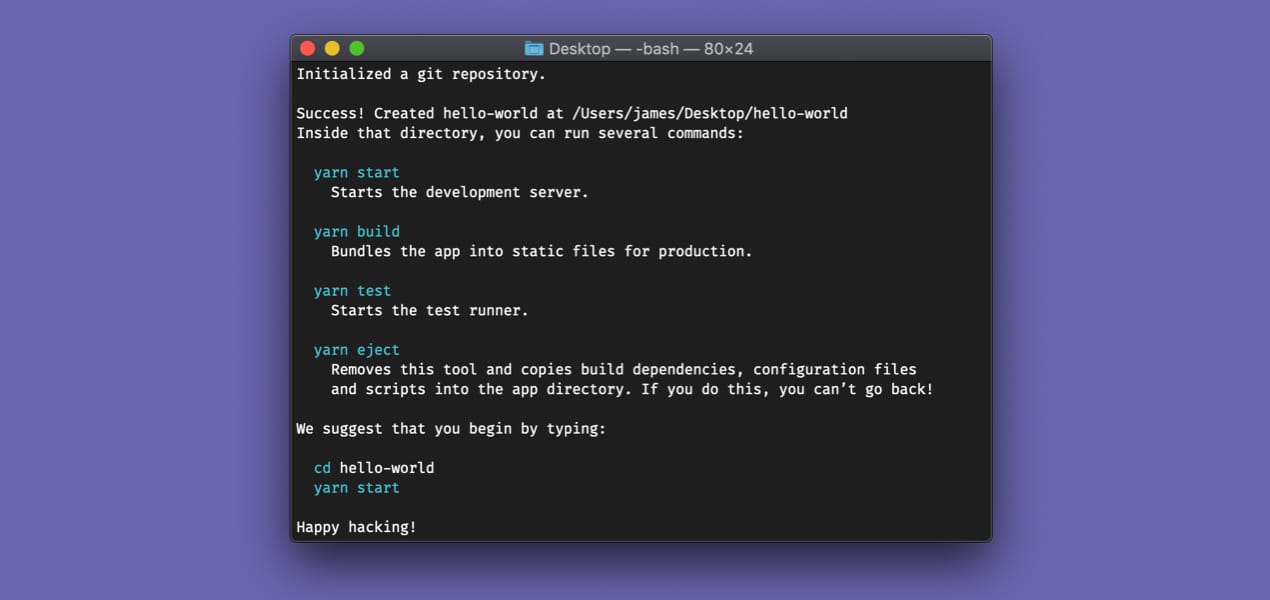
Once Create React App has finished downloading all of the required packages, modules and scripts, it will configure webpack and you’ll end up with a new folder named after what we decided to call our React project. In our case, hello-world.
Open up the hello-world directory in your favorite IDE and navigate to it in your terminal. To do that, run the following command to jump in to our Hello World React app’s directory.
cd hello-worldRun the React App
- Start the React app by typing npm start into the terminal. You must be in the root folder level (where package.json is!).
- Changes made to the React app code are automatically shown in the browser thanks to hot reloading.
- Stop the React app by pressing Ctrl + C in the terminal.
I know what you’re thinking: “How can I jump straight into a React component and start coding?”.
Hold your horses!
Before we jump into writing our first Hello World React component, it’d be nice to know if our React app compiles and runs in the browser with every change that we make to the code.
Luckily for us, the kind folks over at Facebook who develop Create React App have included hot reloading out of the box to the generated React project.
Hot reloading means that any changes we make to the running app’s code will automatically refresh the app in the browser to reflect those changes. It basically saves us that extra key stroke of having to refresh the browser window.
You might not think hot reloading is important, but trust me, you’ll miss it when it’s not there.
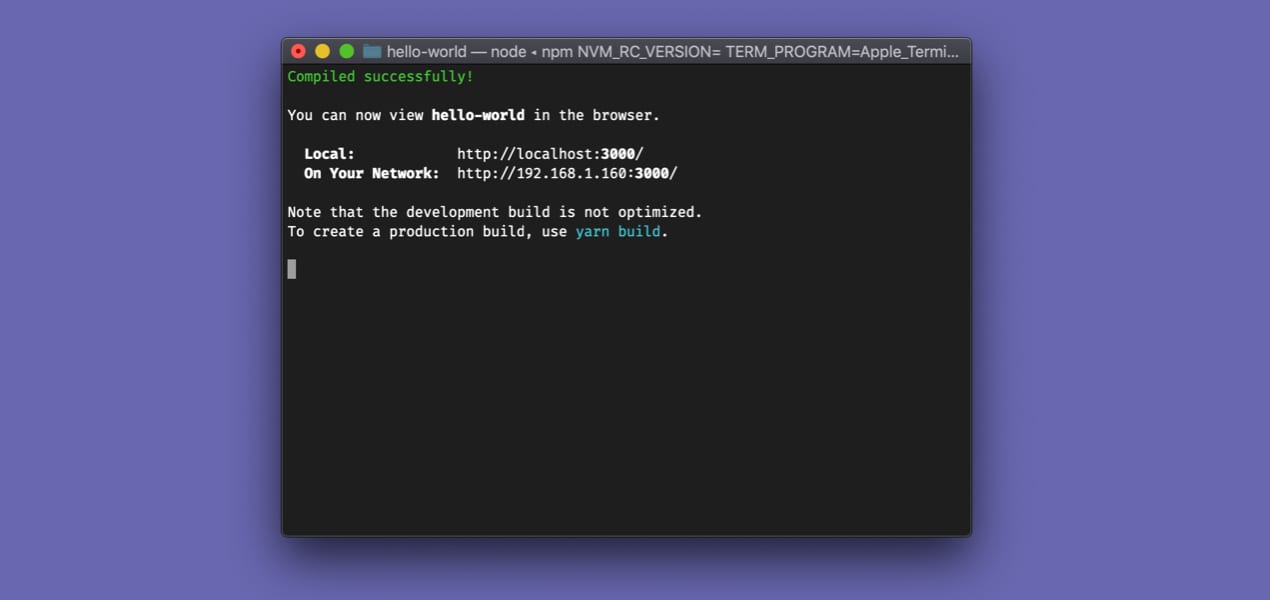
To start our React app, using the same terminal window, run the following command:
npm startLet’s back pedal for just one moment because it’s important that we understand what every command does and means.
So, what on earth does npm start mean? Well, npm stands for Node Package Manager which has become the de facto package manager for the web.
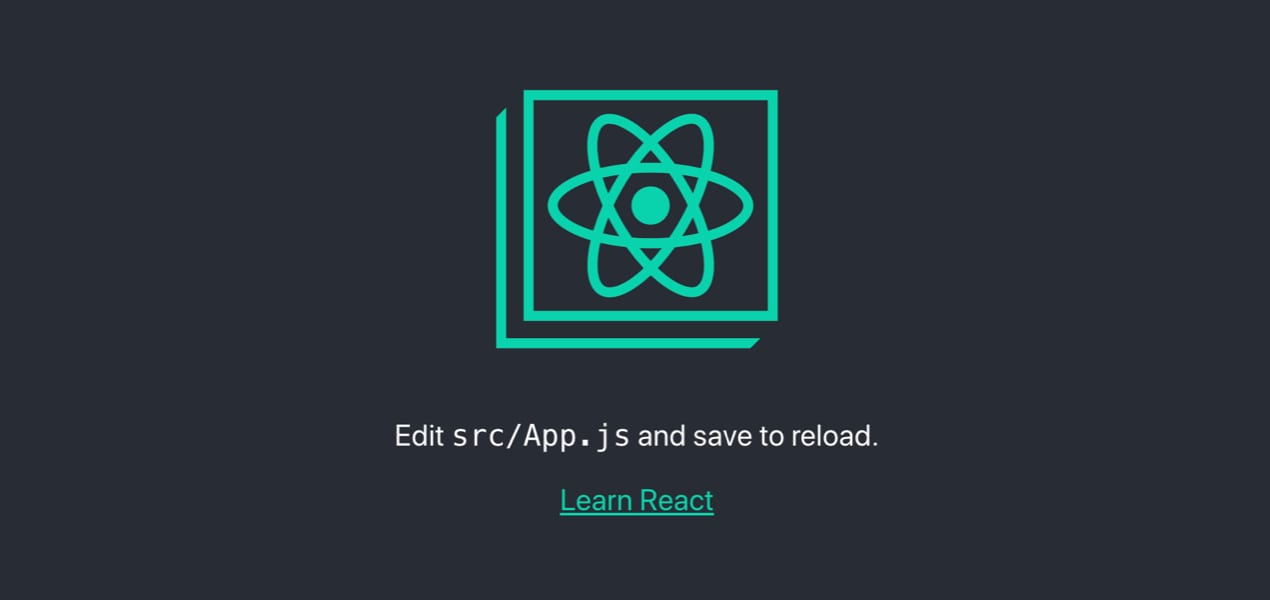
If all goes well, a new browser tab should open showing the placeholder React component, like so:
If for whatever reason the browser does not appear, or the app doesn’t start, load up a new browser window yourself and navigate to: http://localhost:3000.
Create React App runs the web app on port 3000. You can change this if you want to by creating a new file named .env in your root project directory and add the following to it:
PORT=3001You can even access the running React app from another laptop or desktop that’s on the same network by using the network IP address, as shown below:
Understand the Folder Structure
Open the hello-world project folder in your IDE or drag the whole folder to the IDE shortcut (this usually opens up the project).
You’ll see three top level sub-folders:
- /node_modules: Where all of the external libraries used to piece together the React app are located. You shouldn’t modify any of the code inside this folder as that would be modifying a third party library, and your changes would be overwritten the next time you run the npm install command.
- /public: Assets that aren’t compiled or dynamically generated are stored here. These can be static assets like logos or the robots.txt file.
- /src: Where we’ll be spending most of our time. The src, or source folder contains all of our React components, external CSS files, and dynamic assets that we’ll bring into our component files.
At a high level React has one index.html page that contains a single div element (the root node). When a React app compiles, it mounts the entry component — in our case, App.js — to that root node using JavaScript.
Have you heard the term SPA? (I’m not talking about a place where you relax with two cucumbers over your eyeballs).
SPA stands for “Single Page App” and it applies to web apps that use a single HTML file as the entry point (hence the term “Single Page”). JavaScript is then handles things like routing or component visibility.
Install Additional React Libraries
One of the more important files inside of our React project is the package.json file.
Think of this file as the React app’s configuration file. It is central to providing any metadata about our project, adding any additional libraries to our project, and configuring things like run scripts.
The package.json file for a fresh React app created with CRA looks like this:
{
  "name": "hello-world",
  "version": "0.1.0",
  "private": true,
  "dependencies": {
    "react": "^16.10.1",
    "react-dom": "^16.10.1",
    "react-scripts": "3.1.2"
  },
  "scripts": {
    "start": "react-scripts start",
    "build": "react-scripts build",
    "test": "react-scripts test",
    "eject": "react-scripts eject"
  },
  "eslintConfig": {
    "extends": "react-app"
  },
  "browserslist": {
    "production": [
      ">0.2%",
      "not dead",
      "not op_mini all"
    ],
    "development": [
      "last 1 chrome version",
      "last 1 firefox version",
      "last 1 safari version"
    ]
  }
}
For example, instead of writing an entire routing library from scratch, (which would take a very long time) we could simply add a routing library (React Router, for example) to our project by adding it to the package.json file, like so:
...
  "dependencies": {
    "react": "^16.10.1",
    "react-dom": "^16.10.1",
    "react-router-dom": "^5.1.2",
    "react-scripts": "3.1.2"
  },
...
Once you have typed the library name followed by the version of that library that you’d like to install, simply run the npm install command in the terminal, like so:
npm installThis will download the library (or libraries if you added multiple to the package.json file) and add it to the node_modules folder at the root level of you project.
Alternatively, you can add a library to a React project by typing npm install followed by the name of the library you wish to add, into the terminal:
npm install react-router-domOnce that library is installed, we can simple import it into any React component.
Create a Hello World React Component
- A React component is written as either a .JSX file or .JS file.
- A React component name and filename is always written in Title Case.
- The component file contains both the logic and the view, written in JavaScript and HTML, respectively.
- JSX enables us to write JavaScript inside of HTML, tying together the component’s logic and view code.
Go ahead and create a new file under the /src directory. We’ll stick to convention and name our new React component HelloWorld.js.
Next, type or copy the following code into the file.
import React from 'react';

const HelloWorld = () => {

  function sayHello() {
    alert('Hello, World!');
  }

  return (
    <button onClick={sayHello}>Click me!</button>
  );
};

export default HelloWorld;
This is a very simple React component. It contains a button, which when clicked, shows an alert that says “Hello, World!”.
Yes, it’s trivial, but the Hello World React component above is actually a really good example of a first React component. Why? Because it has both view code and logic code.
Let’s explore the view code first, inside of the return statement:
...
  return (
    <button onClick={sayHello}>Click me!</button>
  );
...
This component contains one button that when clicked calls a function named sayHello which is declared directly above the return statement.
Any function that this component’s View code calls will likely be inside of the same component code.
I say it’s likely because there are occasions where you may reference functions that are contained outside of the Component, for example, if passed down through props.
Use the Hello World React Component
- Imports are made at the top of a React component.
- React components are imported into other React components before using them.
- Using a component is as simple as declaring it inside of tags, for example: <HelloWorld />
Open up App.js. It should look something like this:
import React from 'react';
import logo from './logo.svg';
import './App.css';

function App() {
  return (
    <div className="App">
      <header className="App-header">
        <img src={logo} className="App-logo" alt="logo" />
        <p>
          Edit <code>src/App.js</code> and save to reload.
        </p>
        <a
          className="App-link"
          href="https://reactjs.org"
          target="_blank"
          rel="noopener noreferrer"
        >
          Learn React
        </a>
      </header>
    </div>
  );
}

export default App;
Go ahead and delete everything apart from the div wtith the App class. Then, import our new HelloWorld React component at the top of the file, alongisde the other imports.
Finally, use the HelloWorld component by declaring it inside of the return statement:
import React from 'react';
import HelloWorld from './HelloWorld';
import './App.css';

function App() {
  return (
    <div className="App">
      <HelloWorld />
    </div>
  );
}

export default App;
Save App.js ( Hot reloading takes care of reloading the running app in the browser, remember?) and jump on back to your browser.
You should see our HelloWorld component now displayed. Go ahead, click the button and you’ll see something like this:
Wrapping Up
Well, there you have it. A complete beginning-to-end tutorial on building your first React component.
I hope you enjoyed it. If you have any questions about this tutorial or indeed getting started with React, leave a comment below. See you next time!
💬 Leave a comment