
A Textarea is an HTML element that takes text input from the user. The input can then be submitted via a form or just by getting the inner text of the element.
Sometimes we’d like to be able to resize the textarea as we type within it — that way, it doesn’t take up space when it doesn’t have to, and it can also show the entire input no matter how much input we type in.
In this tutorial we’ll go over in detail how to build an autosizing textarea from scratch.
We’ll first build the base textarea element to show how it works.
We’ll start with a standard React structure. In index.js:
import React from 'react';
import ReactDOM from 'react-dom';
import './App.css';
import App from './App';

ReactDOM.render(

   <React.StrictMode>

    <App />

  </React.StrictMode>
  ,

  document.getElementById('root')

);
Then, in App.js:
import { InputElem } from './InputElem.js';

function App() {

  return (

    <InputElem />

  )

}

export default App;
Now, we’ll put the code for our text area within InputElem.js:
/*
Create an element with an text area
*/

import React from 'react';

function InputElem() {
  return (
    <div>
      <textarea></textarea>
    </div>
  );
}

export { InputElem };
If we now type some text into our newly-created textarea, we find that unless we manually drag the resizing tool in the bottom-right corner of the textarea, we cannot resize the textarea.
We’ll now fix this problem by making the textarea taller, instead of confining a large amount of text within the textarea. The first step is to add an onChange event handler:
/*
Define a function called 'handleChange'.
'handleChange' logs to the console.
onChange, the textarea calls 'handleChange'.
*/

import React from 'react';

function InputElem() {

  function handleChange() {

    console.log('The textarea has changed!');

  }

  return (

    <div>

      <textarea onChange={handleChange}> </textarea>

    </div>

  );

}

export { InputElem };
Now, we need the handleChange function to be able to compare the height of the textarea and its inner text. We’ll print out the two values we need: the height of the text in the textarea, and the amount of rows the textarea is displaying to the screen.
/*
Add a parameter in 'handleChange' for the event.
The 'handleChange' function should save the height of the event's target to a new variable.
It should also save the rows of the event's target to a new variable.
*/

import React from 'react';

function InputElem() {

  function handleChange(event) {

    const height = event.target.scrollHeight;
    const rows = event.target.rows;
    console.log(height, rows);

  }

  return (

    <div>

      <textarea onChange={handleChange}> </textarea>

    </div>

  );

}

export { InputElem };
The two important values we identified have very different values, because the height variable’s unit is pixels, whereas the rows variable counts the lines of text that can be displayed. We need to make the variables compatible with each other.
/*
Create a new variable with the height of each line in pixels, 15.
Divide 'height' by this variable, ceil, subtract 1, and store the result in a new variable 'trows'.
*/

import React from 'react';

function InputElem() {

  function handleChange(event) {

    const height = event.target.scrollHeight;
    const rows = event.target.rows;
    const rowHeight = 15;
    const trows = Math.ceil(height / rowHeight) - 1;
    console.log(height, rows, trows);

  }

  return (

    <div>

      <textarea onChange={handleChange}> </textarea>

    </div>

  );

}

export { InputElem };
Now, we can compare the variables trows and rows to see if we should resize the textarea.
/*
Instead of logging to the console, compare 'rows' and 'trows'.
If 'trows' is greater than 'rows', print out the difference.
*/

import React from 'react';

function InputElem() {

  function handleChange(event) {

    const height = event.target.scrollHeight;
    const rows = event.target.rows;
    const rowHeight = 15;
    const trows = Math.ceil(height / rowHeight) - 1;

    if (trows rows) {

      console.log((trows - rows) + ' more rows');

    }

  }

  return (

    <div>

      <textarea onChange={handleChange}> </textarea>

    </div>

  );

}

export { InputElem };
The code above is now capable of detecting when the textarea should be resized, and by how much. We’ll now use the useState hook to resize the component.
/*
In the function 'InputElem', use 'useState' to create a state variable 'textareaHeight' for the textarea's height, with initial value 1.
Inside the if statement, use 'useState' to set the rows to 'trows'.
*/

import React from 'react';
import { useState } from 'react';

function InputElem() {

  const [textareaheight, setTextareaheight] = useState(1);

  function handleChange(event) {

    console.log( event.target.rows )
    const height = event.target.scrollHeight;
    const rowHeight = 15;
    const trows = Math.ceil(height / rowHeight) - 1;

    if (trows textareaheight) {

      setTextareaheight(trows);

    }

  }

  return (

    <div>

      <textarea rows={textareaheight} onChange={handleChange} > </textarea>

    </div>

  );

}

export { InputElem };
Below is our finished product:
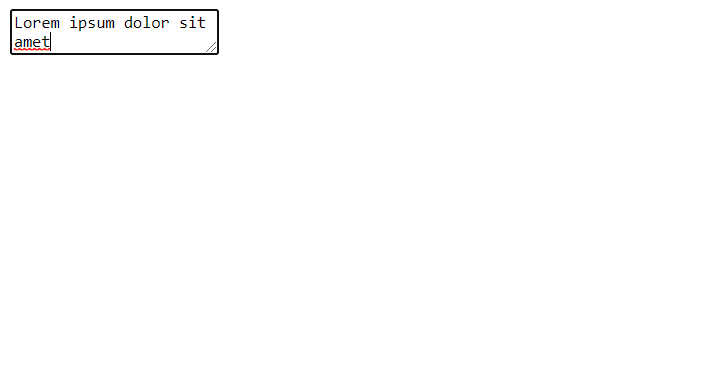
This textarea autosizes whenever text is added that exceeds its current size.
Thank you for following with this tutorial!
💬 Leave a comment