
In this tutorial, we’ll create a simple movie-themed web app using Airtable and React. So, what are you waiting for? Let’s get started!
Table of Contents
- Introduction
- What Are We Making?
- Setting up the React App
- Scaffolding with Create React App
- Adding Bootstrap
- Importing Bootstrap
- Creating the Base Component
- Stubbing out the Base Component
- Creating the MovieCard Component
- Looping Through the Array
- Setting up Airtable
- Customizing the Airtable Base
- Accessing the Airtable Bases’ API
- Integrating React and Airtable
- Using our Airtable Data
- Wrapping up React and Airtable
Introduction
Before we begin, I’m sure some of you are wondering what Airtable is.
Airtable looks and feels like a spreadsheet, but it’s actually a database with an easy to use API that we can plug straight into our front-end with little effort.
Just like in Google Sheets how you add your data in rows and columns, Airtable also lets you add data in rows and columns. The user interface feels very familiar to Google sheets, making it very easy to understand and use by non-technical people.
If you’d like to read more about Airtable before we get started on our web app, you can check out their excellent getting started guide.
What Are We Making?
We’re keeping with the movie theme in this tutorial because I’m a huge fan of
I try to stick with the same tools and libraries in all of my web apps. Therefore, we’ll be using the following stack:
- React
- Bootstrap 4.1
- Airtable
That’s it! Just three ingredients for a delicious web app! Let’s open our text editors and terminals and begin, shall we? Oh, if you’re using Atom, be sure to check out the Best Atom Plugins for Front End Developers.
Setting up the React App
Our first task is to create a new React project. We could do this manually, but that would take too long. Instead, we’re using a tool the React team at Facebook have created called Create React App.
Scaffolding with Create React App
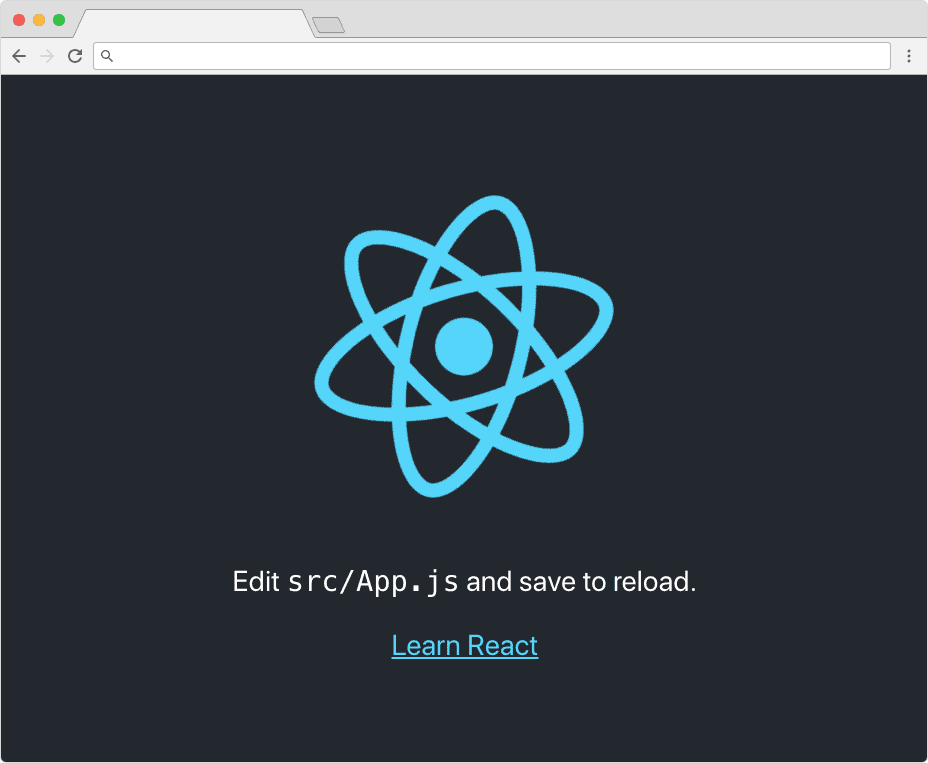
Go to the Create React App Github repository page and follow the instructions on setting up a new React project. Come back here when you have the base app up and running. It should look something like this:
Adding Bootstrap
Now that we have our React app working, our second task is to add Bootstrap to the codebase. For those who don’t know, Bootstrap is a component library which gives us well documented, styled HTML components such as buttons, cards, tabs, etc.
If you’re wondering what the difference between React and Bootstrap is, think of them within the context of a novel. React would be the spine and pages of the book, while Bootstrap would be the words, headings,
and images.
There is a library called Reactstrap that has ‘
To install the latest Bootstrap, open up a terminal window, make sure you’re in the new React project directory, and run the following commands:
npm i bootstrap --save && npm i popper.js --save && npm i jquery --saveThis command installs three libraries:
- Bootstrap.
- Popper.js, a bootstrap dependency that powers the tooltips and popover components.
- jQuery, another bootstrap dependency that Bootstrap relies on for animations, hiding and showing of elements, amongst other things.
If all goes well, you should see a console output that looks very similar to this:
+ bootstrap@4.1.3
added 1 package from 2 contributors in 18.516s
[+] no known vulnerabilities found [35668 packages audited]

npm WARN bootstrap@4.1.3 requires a peer of jquery@1.9.1 - 3 but none is installed. You must install peer dependencies yourself.

+ popper.js@1.14.5
added 1 package from 2 contributors in 16.791s
[+] no known vulnerabilities found [35669 packages audited]

+ jquery@3.3.1
added 1 package from 1 contributor in 15.364s
[+] no known vulnerabilities found [35670 packages audited]
Importing Bootstrap
You’re halfway there! Next, we need to actually import bootstrap into our React app so that we can begin using it.
We want Bootstrap to be accessible from anywhere in our code. Therefore, we should import it at the root of the application.
Open up index.js and add two new import statements for the Bootstrap CSS and JS files, towards the end of the existing imports:
import React from 'react';
import ReactDOM from 'react-dom';
import './index.css';
import App from './App';
import * as serviceWorker from './serviceWorker';

// Import Bootstrap CSS and JS
import 'bootstrap/dist/css/bootstrap.css';
import 'bootstrap/dist/js/bootstrap.js';


ReactDOM.render(<App />, document.getElementById('root'));

// If you want your app to work offline and load faster, you can change
// unregister() to register() below. Note this comes with some pitfalls.
// Learn more about service workers: http://bit.ly/CRA-PWA
serviceWorker.unregister();
Good stuff! Now, let’s make sure Bootstrap has been imported successfully. Open up App.js and add one line of HTML to insert a Bootstrap styled HTML button component, immediately below the ‘Learn React’ link:
import React, { Component } from 'react';
import logo from './logo.svg';
import './App.css';
class App extends Component {
render() {
return (
<div className="App">
<header className="App-header">
<img src={logo} className="App-logo" alt="logo" />
<p>
Edit <code>src/App.js</code> and save to reload.
</p>
<a
className="App-link"
href="https://reactjs.org"
target="_blank"
rel="noopener noreferrer"
>
Learn React
</a>
<button type="button" className="btn btn-primary">Primary</button>
</header>
</div>
);
}
}
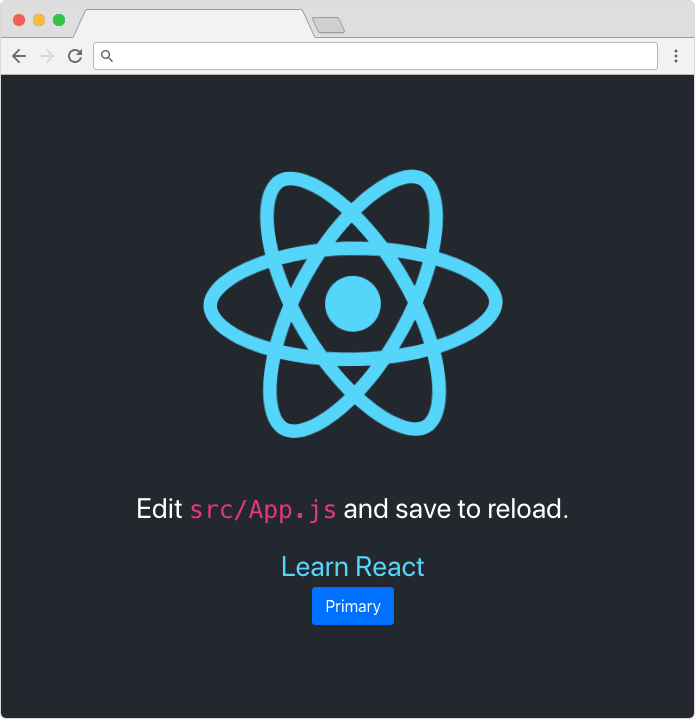
export default App;Save your changes and navigate to the running web app in your browser. If you see a blue button, similar to the screenshot below, then you’ve installed and imported Bootstrap successfully and we can move on!
Creating the Base Component
When building a dynamic web app, I always like to ‘stub’ out the components first using dummy data. This involves creating the user interface and populating it using static data that I define at the top of the component. You’ll see what I mean in a few minutes.
While you’re in App.js, go ahead and delete everything in the render function, as well as the last two import statements at the top of the file.
Then, add a Bootstrap container, row,
import React, { Component } from 'react';

class App extends Component {
  render() {
    return (
      <div className="container mt-5">
        <div className="row">
          <div className="col">
            ...
          </div>
        </div>
      </div>
    );
  }
}

export default App;
Don’t hit that save button just yet! We need to add our card HTML components inside the column class. For now, we’ll add three cards:
import React, { Component } from 'react';
class App extends Component {
render() {
return (
<div className="container mt-5">
<div className="row">
<div className="col">
<div className="card-deck">
<div className="card">
<img className="card-img-top" src="https://via.placeholder.com/362x200" alt="Card image cap" />
<div className="card-body">
<h5 className="card-title">Card title</h5>
<p className="card-text">This is a longer card with supporting text below as a natural lead-in to additional content. This content is a little bit longer.</p>
<p className="card-text"><small className="text-muted">Last updated 3 mins ago</small></p>
</div>
</div>
<div className="card">
<img className="card-img-top" src="https://via.placeholder.com/362x200" alt="Card image cap" />
<div className="card-body">
<h5 className="card-title">Card title</h5>
<p className="card-text">This card has supporting text below as a natural lead-in to additional content.</p>
<p className="card-text"><small className="text-muted">Last updated 3 mins ago</small></p>
</div>
</div>
<div className="card">
<img className="card-img-top" src="https://via.placeholder.com/362x200" alt="Card image cap" />
<div className="card-body">
<h5 className="card-title">Card title</h5>
<p className="card-text">This is a wider card with supporting text below as a natural lead-in to additional content. This card has even longer content than the first to show that equal height action.</p>
<p className="card-text"><small className="text-muted">Last updated 3 mins ago</small></p>
</div>
</div>
</div>
</div>
</div>
</div>
);
}
}
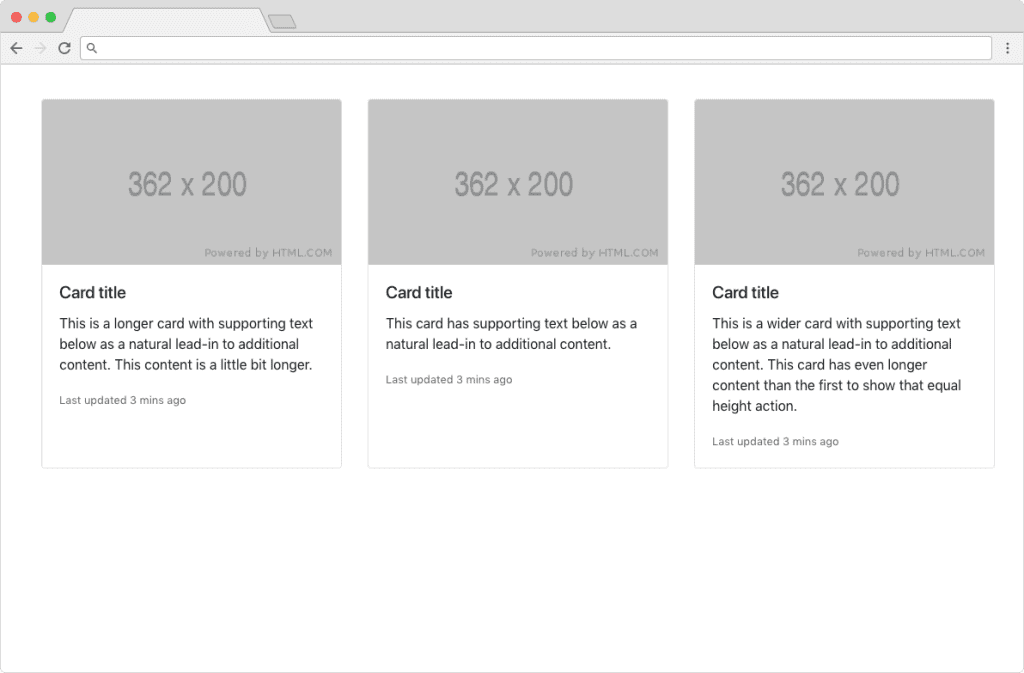
export default App;Each card component is filled with static content for now, so we can see what our app will look like once it’s being populated with dynamic data from Airtable.
Now you can hit that save button! Once it’s refreshed, you should see something that looks like this:
Stubbing out the Base Component
Now that we have three static movie cards looking nice in our component, we can begin to ‘stub’ out the data. When stubbing out the data, I do the following:
- Create a temporary array of objects which mimics the structure of the data that will eventually be passed into this component from our database via an API. In this case, Airtable.
- Turn the static HTML components into a new React component, so that I can dynamically render it.
- Loop through the array of objects, rendering out the new React component for each object.
Let’s start with the first step. At the top of our App.js component, right after the import statement, add the following array of objects:
const movieData = [
  {
      title: 'Avengers: Infinity War',
      year: '2018',
      description: 'Iron Man, Thor, the Hulk and the rest of the Avengers unite to battle their most powerful enemy yet -- the evil Thanos. On a mission to collect all six Infinity Stones, Thanos plans to use the artifacts to inflict his twisted will on reality.',
      imageURL: 'https://via.placeholder.com/362x200',
  },
  {
      title: 'Bohemian Rhapsody',
      year: '2018',
      description: 'Bohemian Rhapsody is a foot-stomping celebration of Queen, their music and their extraordinary lead singer Freddie Mercury. Freddie defied stereotypes and shattered convention to become one of the most beloved entertainers on the planet.',
      imageURL: 'https://via.placeholder.com/362x200',
  },
  {
      title: 'The Incredibles 2',
      year: '2018',
      description: 'Everyone’s favorite family of superheroes is back in “Incredibles 2” – but this time Helen is in the spotlight, leaving Bob at home with Violet and Dash to navigate the day-to-day heroics of “normal” life.',
      imageURL: 'https://via.placeholder.com/362x200',
  },
];
What we’re doing here is instantiating a new constant of type array. Inside this array are three objects, each with a title, year, description, and imageURL key/value pairs.
Creating the MovieCard Component
This is where the fun begins…
We’ve checked off step one: stubbing out our component with dummy data.
If you remember our three steps from before, step two was converting the static HTML components into a React component. To do that, at the bottom of App.js after the export statement, let’s define a new stateless, functional React component called MovieCard:
const MovieCard = () => (
  <div className="card">
    <img className="card-img-top" src="https://via.placeholder.com/362x200" alt="Card image cap" />
    <div className="card-body">
      <h5 className="card-title">Card title</h5>
      <p className="card-text">This is a wider card with supporting text below as a natural lead-in to additional content. This card has even longer content than the first to show that equal height action.</p>
      <p className="card-text">
        <small className="text-muted">Last updated 3 mins ago</small>
      </p>
    </div>
  </div>
);
Remember, all React component names are written in upper camel case (pascal case). For example: MovieCard, TableList, and SideBar.
A stateless functional component has no state, and its props are passed into
Our component has no props. Let’s go ahead and add these to the parameter list. We’ll also add the props in the HTML so we can begin to populate our HTML component with the values that are passed into the props.
const MovieCard = ({ title, year, description, imageURL }) => (
  <div className="card">
    <img className="card-img-top" src={imageURL} alt="Movie poster" />
    <div className="card-body">
      <h5 className="card-title">{title}</h5>
      <p className="card-text">{description}</p>
      <p className="card-text">
        <small className="text-muted">{year}</small>
      </p>
    </div>
  </div>
);
Looping Through the Array
Now for the magic part! Our third and final step for stubbing out our component is to loop through the array of objects and render a new copy of our MovieCard component for each object in that array.
Begin by deleting the static HTML card components from the render function, keeping the outer .card-deck div, like so:
class App extends Component {
  render() {
    return (
      <div className="container mt-5">
        <div className="row">
          <div className="col">
            <div className="card-deck">
              ...
            </div>
          </div>
        </div>
      </div>
    );
  }
}
Finally, inside the .card-deck div, loop through the temporary movieData array we defined earlier and render a new copy of our <MovieCard /> component for each object in the movieData array.
class App extends Component {
  render() {
    return (
      <div className="container mt-5">
        <div className="row">
          <div className="col">
            <div className="card-deck">
              {movieData.map(movie => <MovieCard {...movie} /> )}
            </div>
          </div>
        </div>
      </div>
    );
  }
}
The line of code we inserted above is doing quite a lot for one line of code.
- We’re looping through our movieData array.
- For each object in that array, we’re returning our <MovieCard /> component.
- Finally, we’re passing in the entire movie object into the <MovieCard /> component as props.
Save the file, switch to your web browser and you should see something similar to before, but this time the cards are being populated by the data defined in our array!

Play around with the array data for a while so you can see how the data is populating our MovieCard components. Try changing the data in the array. Add more objects to the movieData array to see more cards being added to our web app.
I suggest you take a minute to go over what we’ve covered so far before moving onto the next section!
Setting up Airtable
The final piece of the React and Airtable web app puzzle — Plugging an Airtable database into our quite static front end!
Sign up for a new Airtable account if you haven’t already.
I’d really appreciate it if you used my referral link: https://airtable.com/invite/r/w7plpPSM.
(Full disclosure: after signing up, I receive a $10 credit towards my Airtable account.)
You should be redirected to the dashboard page where you can create a new base after creating a new account. A base is Airtables name for a database.
Click the ‘Add a base’ button and then ‘Start from scratch’.
Give your new base a name (I chose ‘Movies’ — it felt appropriate), change the color, and pick a funky icon. Once you’re done customizing your base, click into it.
Customizing the Airtable Base
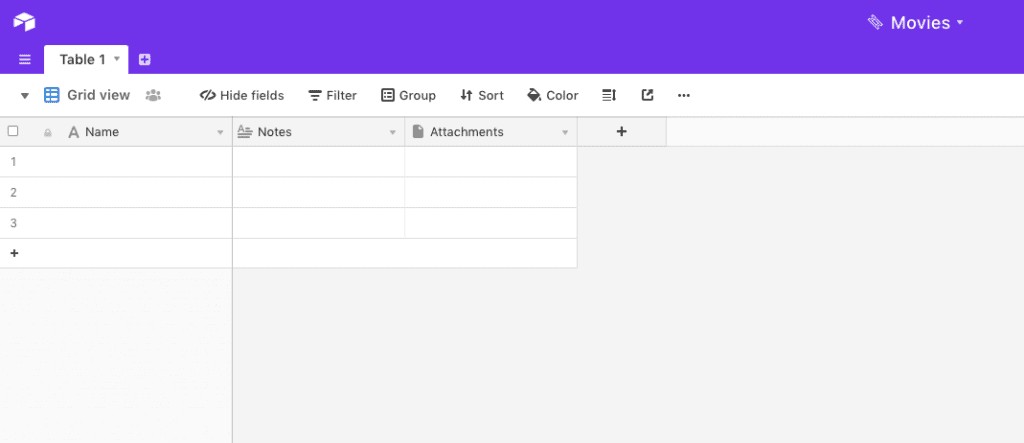
An empty base always starts with three columns: ‘Name’, ‘Notes’, and ‘Attachments’. We want to store data about our favorite movies. Change the current column structure by:
- Rename ‘Table 1’ to ‘favorites’.
- Delete the ‘Notes’ and ‘Attachments’ columns.
- Rename the ‘Name’ column to ‘title’ (use lowercase!).
- Create a new column of type number and name it ‘year’.
- Add a new column of type long text and name it ‘description’.
- Create a new column of type attachment and name it ‘
imageURL ‘.
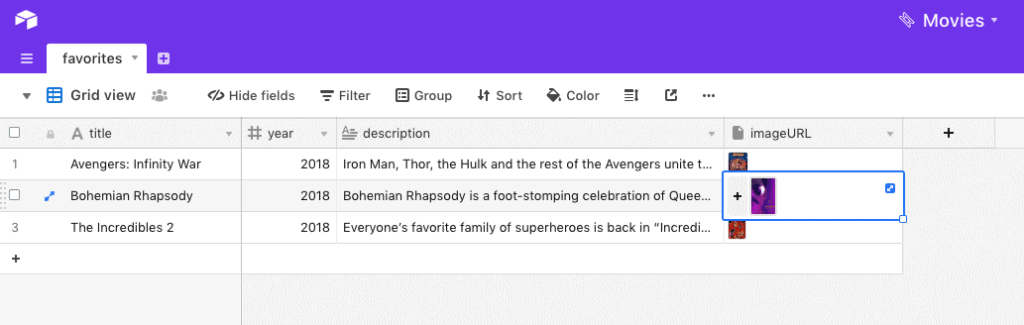
You can start adding in the movie data once you have added these columns. Feel free to add new movies, or copy the data from the movieData array we defined earlier in the tutorial.
You’ll have to find images of the movie posters online so you can upload them to the ‘imageURL’ column.
Accessing the Airtable Bases’ API
What makes Airtable so great for developers is their API. Each base provides its own very well documented API, allowing you to add, delete, edit, and save data from within your own apps. How great is that?!
The best part is the API is already set up for you, and it’s absolutely free!
While you’re still signed in, go to https://airtable.com/api.
Find your base and click on it. In front of you is some rather lengthy technical documentation that describes how you interact with the Airtable API.
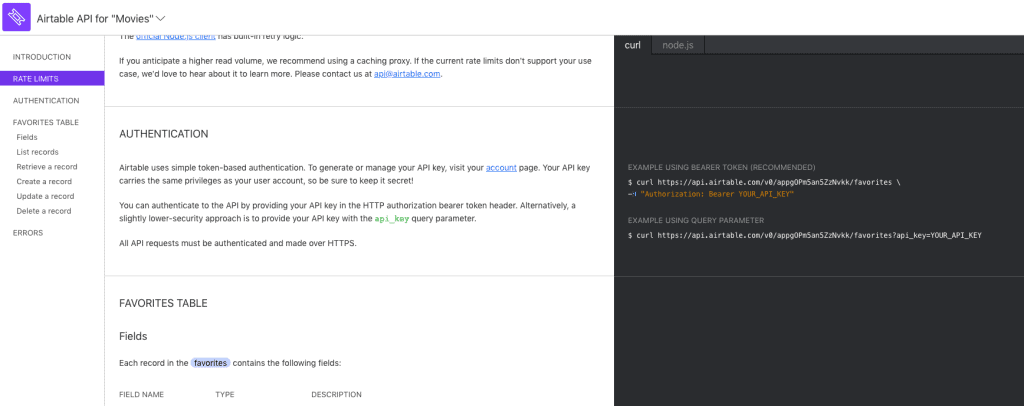
Scroll down to ‘Authentication’ and look at the code examples in the dark section to the right of the screen. We’re interested in the line of code under ‘EXAMPLE USING QUERY PARAMETER’.
Copy and paste just the URL somewhere for now, or make a note of it. We will need this very soon. Make sure you click the ‘Show API Key’ checkbox in the upper right-hand corner.
https://api.airtable.com/v0/appgOPm5an5ZzNvkk/favorites?api_key=YOUR_API_KEYIntegrating React and Airtable
Next let’s bring the data from Airtable into our React app.
An API (short for Application Programming Interface) is a way for software to communicate with each other. For example, our React web app wants to know what movies are stored in our Airtable database.
Airtable provides us with API documentation which tells us what URLs we must talk to from our React web app.
Open your text editor and go to the App.js component.
Let’s add
Define an initial state inside of a constructor method, like so:
class App extends Component {

  constructor(props) {
    super(props);
    this.state = {
      movies: [],
    };
  }

  ...

}
We’re setting the initial state of the App component to be an object with an empty array named ‘movies’.
Add another method called componentDidMount directly underneath this new constructor method.
  ...

  componentDidMount() {
    fetch('https://api.airtable.com/v0/appgOPm5an5ZzNvkk/favorites?api_key=YOUR_API_KEY')
    .then((resp) => resp.json())
    .then(data => {
       this.setState({ movies: data.records });
    }).catch(err => {
      // Error :(
    });
  }

  ...
componentDidMount is a lifecycle method of a class component. The code inside of it is run whenever a component is ready to be loaded onto the page.
The code above does several things:
- It adds the componentDidMount method, so that code is run once the component is ready to be shown on the web page.
- It uses fetch to call the Airtable API and get our list of movies we added to it earlier.
- It updates the component state key ‘movies’ to be the data coming back from Airtable.
Remember to use your Airtable API_KEY and code I asked you to save earlier or this won’t work!
Using our Airtable Data
Finally, change the render method to use our new ‘movies’ array stored in the component state:
  ...

  render() {
    return (
      <div className="container mt-5">
        <div className="row">
          <div className="col">
            <div className="card-deck">
              {this.state.movies.map(movie => <MovieCard {...movie.fields} /> )}
            </div>
          </div>
        </div>
      </div>
    );
  }

  ...
We need to modify the MovieCard component so that the HTML image component src attribute points to the correct value in the object:
const MovieCard = ({ title, year, description, imageURL }) => (
<div className="card">
<img className="card-img-top" src={imageURL[0].url} alt="Movie poster" />
<div className="card-body">
<h5 className="card-title">{title}</h5>
<p className="card-text">{description}</p>
<p className="card-text">
<small className="text-muted">{year}</small>
</p>
</div>
</div>
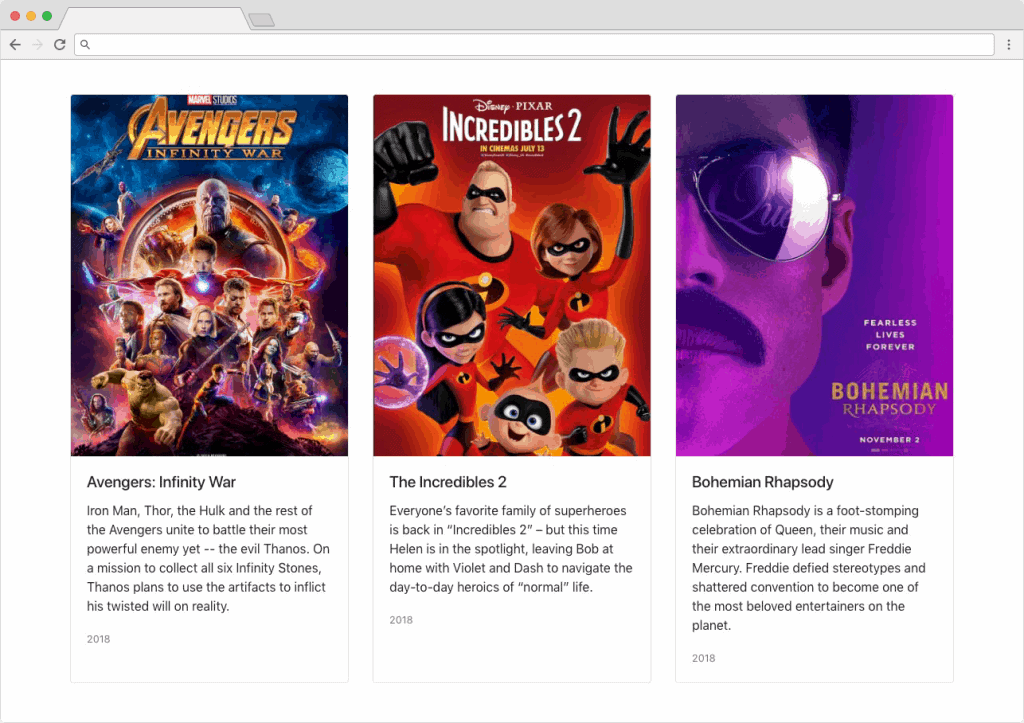
);Save and check out the running web app in your browser. You should see some really great looking, data-driven movie cards!
The final component is below:
import React, { Component } from 'react';

class App extends Component {

  constructor(props) {
    super(props);
    this.state = {
      movies: [],
    };
  }

  componentDidMount() {
    fetch('https://api.airtable.com/v0/YOUR_AIRTABLE_ENDPOINT?api_key=YOUR_API_KEY')
    .then((resp) => resp.json())
    .then(data => {
      console.log(data);
      this.setState({ movies: data.records });
    }).catch(err => {
      // Error
    });
  }

  render() {
    return (
      <div className="container mt-5">
        <div className="row">
          <div className="col">
            <div className="card-deck">
              {this.state.movies.map(movie => <MovieCard {...movie.fields} /> )}
            </div>
          </div>
        </div>
      </div>
    );
  }
}

export default App;

const MovieCard = ({ title, year, description, imageURL }) => (
  <div className="card">
    <img className="card-img-top" src={imageURL[0].url} alt="Movie poster" />
    <div className="card-body">
      <h5 className="card-title">{title}</h5>
      <p className="card-text">{description}</p>
      <p className="card-text">
        <small className="text-muted">{year}</small>
      </p>
    </div>
  </div>
);
Wrapping Up React and Airtable
There you have it. We created a dynamic web app using React and Airtable.
I hope you enjoyed going through this tutorial as much as I did writing it!
As always, leave a comment if you run into any issues, or if you want more React and Airtable tutorials.
See you next time!
Comments
Hi James!
I’m part-way through your tutorial (I was on a plane when I started, so I’m only just getting back to it now.
In the section “Creating the MovieCard Component” there is a slight error in your code.
This bit here:
“const MovieCard = ({ title, year, description, imageURL }) => (”
I think it should be:
“const MovieCard = ({ name, year, description, image_url }) => (”
or (and probably betterer… I haven’t gone through the Airtable bit yet) you place-setting array (which is currently)
” name: ‘Avengers: Infinity War’,
year: ‘2018’,
description: ‘Iron Man, Thor, the Hulk and the rest of the Avengers unite to battle their most powerful enemy yet — the evil Thanos. On a mission to collect all six Infinity Stones, Thanos plans to use the artifacts to inflict his twisted will on reality.’,
image_url: ‘https://via.placeholder.com/362×200’,”
should probably change name to title and image_url to imageURL.
Anyway, wanted to let you know before I forgot… especially since you specifically told us to refer what we’d done before we start with the next section.
Great catch, thanks for letting me know! I’ve updated the static array object property names so they all match now.
Hi James,
This tutorial is amazing! I’ve finished it and it all totally works… I’ve actually been looking for a tutorial that links React to a database… but honestly, it’s just so nice to actually do a tutorial that doesn’t break halfway through. Your writing is excellent and everything was so clear.
The only thing I’d mention is maybe add a screen shot of the ‘Show API key’ checkbox you mention in the “Accessing the Airtable Bases’ API” section? I couldn’t find what you were talking about… but I did find a way to generate my API key in my Account section, and that totally worked, my react app looks great.
So… I don’t want to sound greedy because I really am super appreciative on this incredible tutorial.. but would you consider a follow on tutorial where we write to the database from within the app? I’d love that so hard!
Hi AussieNinja,
First of all — thank you for the kind feedback, I’m very glad you enjoyed the tutorial!
I can definitely add a screenshot of the show API key box if you think it’ll help. I think Airtable is fantastic, so I’d like to follow this up with a part two. Perhaps it could be writing a record, updating a record and deleting a record from Airtable?
Hi James!
Ah… that would be beyond amazing! Yes, I forgot about modifying and deleting records, but of course I’d need that as well.
I’ve just worked out that the “Show API Key” checkbox only appears when you’ve selected your table on the top left hand drop down box. I think I must have had it on “My First Workspace” or something similarly generic.
Thanks again!
Great tutorial! I would love to see filtering data using Airtable and React.
???? Great tut was successful: https://airtable-react-lambda.netlify.com/
I’d love to see anything more on airtable. I agree, your writing and explanation is perfect, clear and very helpful. Thank you!
Kingi, I checked out your app and it looks fantastic, great work! How are you liking Netlify? I’ve yet to check it out.
I really appreciate the kind words, and I’m glad you enjoyed the tutorial. I’ll have some more Airtable tuts for you soon! Perhaps a follow up to this one…
Hi – Thanks so much for this tutorial! I apologize for what may be a silly question, but I’m getting errors at this line:
The error is referencing the “0”. Am I missing something? The picture that is saved in my airtable sheet is a jpg. Does it need to be a png or some other format?
It sounds like you might not be passing the imageURL through to the MovieCard component’s props, therefore imageURL is undefined and not an array. The picture doesn’t need to be a png or jpg. I’ve actually just posted the full source code towards the end of the tutorial, so check that out and let me know if it helps. Good luck, and keep on coding!
Hi James, love this tutorial! thank you!
I have everything working except the final step where you change imageURL to imageURL[0]. I keep getting the following error ‘TypeError: Cannot read property ‘0’ of undefined’. If i remove ‘[0]’ it compiles and runs fine with my live airtable data but with the exception of broken images (obviously).
what am I missing? can you post source so I can make sure I didn’t misplace something.
Hi Jeremy, glad you enjoyed it! ????
My guess is that you’re not passing the imageURL through the MovieCard component’s props, so it’s undefined. I’ve updated the tutorial with the full source code (at the end of the tutorial), so let me know if that helps.
Great tutorial. If you are a front-end developer you need data! This is a perfect way to reach data. Can you make more detailed tutorials about airtable and react?
I’m thinking about doing another tutorial on React with Airtable soon, so keep an eye out. They’re a fantastic pairing when building an MVP! ????
Hi.
Great tutorial but I have an error with the image_url code.
I use the code: “src={imageURL[0].url}”
However i get the error message: Cannot read property ‘0’ of undefined
The only difference is the name of my image column/field in airtable.
Any ideas?
Naka, that’s the reason why. imageURL is the name of the column in my Airtable. If you want to use another name, you’ll have to replace all instances of imageURL with the name you’re using.
Hi James! Have you embedded your tutorial example website anywhere where I can check it out? I want to see what the output is before I go through the entire tutorial, so I can make sure this is the right solution for me. Thank you!
Ask, and you shall receive: https://whispering-citadel-20400.herokuapp.com/ ????
Hi James!
Your app is really a good idea, i was stunned when i first saw it, but when i try to compile it it says “TypeError: this.state.movies is undefined” on line 27, i copied ebery step right, what could it be?
Have you checked that you initialize the movies state property to be an empty array? If so, you should also destructure your state inside of the render method, like so: const { movies } = this.state;
Hi James!
If I have n movies and I want to split them in many rows, so that I have 3 columns per row, how can I do it in the simplest way?
Hi Mat,
If you’re using Bootstrap, use the col-4 CSS class. That will force the row to limit the number of columns to three as 4 x 3 = 12.
One thing that had me stuck for a long time is that you have to go to your account settings and hit generate API key before the ‘Show API Key checkbox’ you spoke will show up in the right hand corner.
Hi James,
Thanks for the great tutorial. I’m new to React and having a problem rendering the final state. See below – my code is otherwise the same as yours, and when I paste your code in, and change my API key, I get the same problem.
Any ideas?
TypeError: Cannot read property ‘map’ of undefined
App.render
C:/Users/JK-PC/my-app/src/App.js:29
26 |
27 |
28 |
> 29 |
| ^ 30 | {this.state.movies.map(movie => )}
31 |
32 |
View compiled
▶ 17 stack frames were collapsed.
(anonymous function)
C:/Users/JK-PC/my-app/src/App.js:18
15 | .then((resp) => resp.json())
16 | .then(data => {
17 | console.log(data);
> 18 | this.setState({ movies: data.records });
| ^ 19 | }).catch(err => {
20 | // Error ????
21 | });
View compiled
Thanks,
Justin
A couple things to note, having an empty last row will cause the error with “property ‘0’ of undefined” for the imageURL[0]. The error “Cannot read property ‘map’ of undefined” means it can’t find your database name from the YOUR_AIRTABLE_ENDPOINT. To get the correct endpoint, generate an API key and refresh the API docs and then the ‘show API key’ option will appear with the correct info as mentioned in the comments.
First, this tutorial is awesome. You got me from ZERO to a full working web app in about 30 minutes. One concern I have is the API KEY itself. If it’s in my javascript, that means it is accessible to an enterprising user that wants to dig through my .js files, right?
Do you have an effective way to prevent people from accessing that? Because I love what I’ve got working, I’m just concerned that we’ve got a bit of a security hole.
For example, the API KEY you’re using ends in “CqF4.” (I’m not malicious, just curious how you’d solve for that.)
Jeff, you’re absolutely right, a curious developer could dig through your minified JS on their client and discover your API key. It’s always recommended that you store API keys and other important environment variables on a server (a node app, for example) away from prying eyes. That way, your client would make a request to your server (acting as middleware), which would route the request to the Airtable API.
Awesome how-to. I’m having the same issue as Justin. I’m getting the Cannot read property ‘map’ of undefined on line 28. Wondering what I’m missing. Thanks for your help.
That’s because whatever you’re ‘mapping’ over isn’t an array. Double-check that the values stored in that object from the response is, in fact, an array.
Hi James,
Can you suggest a way of receiving inputs from user and then displaying data only particular to that user? eg. if somebody enters his email id, being able to find his record from the table and show his details on the next page. if it’s not present then just registering the email id
Thanks for the great tutorial, very well explained. I am facing 1 issue though : I keep having trouble getting the images working. I get a message “TypeError: imageURL is undefined” in the browser, even after adding images to all the rows of my table… any idea what is going wrong here ?