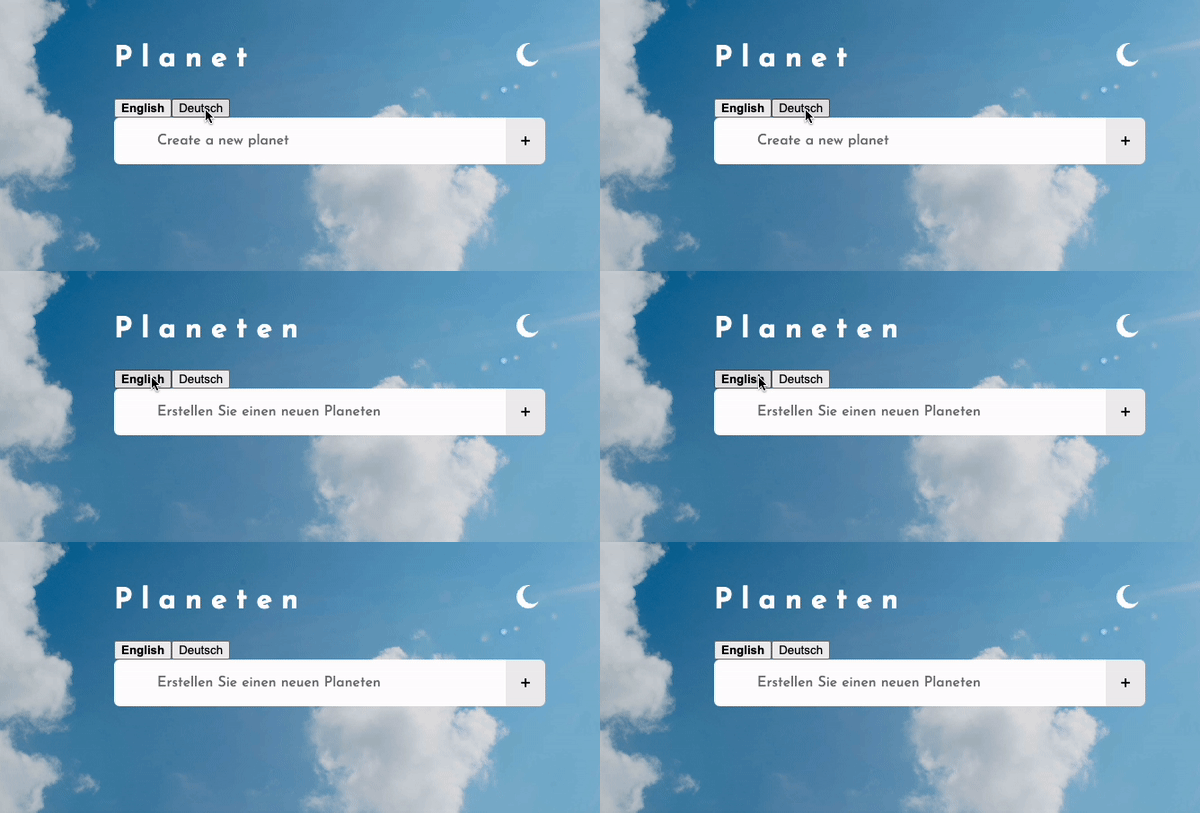
In this article, we are going to work with internationalization. We will make our reactJS application scalable in the long run and work on how to take it along whether it is your newly created application or an application that you’ve been maintaining for a while.
Why Internationalization?
It is the idea of designing and developing your application or product in such a manner that you can enable localization for various audiences because your end user could be coming from different cultures, from many regions, and cultures. Thus it is important to carry your application in such a manner that down the lane if you have to introduce localization it doesn’t cause you much problem.
Localization With react-i18next
We are going to use the node package react-i18next in this guide. We are going to set the configurations of our i18next under the config directory.
import i18n from "i18next";
import { initReactI18next } from "react-i18next";
import LanguageDetector from "i18next-browser-languagedetector";

i18n
  // here we are going to detect users default browser language
  .use(LanguageDetector)

  // here we pass our i18n instance
  .use(initReactI18next)

  //initialization step
  .init({
    debug: true,

    // fallback language in case language is not detected
    fallbackLng: "en",

    interpolation: {
      escapeValue: false,
    },

    resources: {
      en: {
        translation: {
          // here we will keep our translations for different languages
        },
      },
    },
  });
and them calling it so that it can be bundled along with our entire application. Now we can do translation by
- By using Trans component wrapper
- By using useTranslation hook.
Now I prefer useTranslation since it is cleaner to inject into your code and more readable. Let’s see it in action. I am going to translate the placeholder inside my text input. The tweaks I have done to make this happen are
import { useTranslation } from "react-i18next";
import { StyledPlanetInput } from "./styled/PlanetInput.styled";

export default function PlanetInput({ newPlanetInput, handleAddPlanet }) {
  const { t } = useTranslation();
  return (
    <StyledPlanetInput>
      <input
        className="planet-input"
        ref={newPlanetInput}
        type="text"
        placeholder={t("createPlanet")}
      />
      <button className="planet-submit" onClick={handleAddPlanet}>
        +
      </button>
    </StyledPlanetInput>
  );
}
I used the translation hook and called the language resource which was set inside the configuration. Now adding the language to the config.
resources: {
  en: {
    translation: {
      planet: "Planet",
      createPlanet: "Create a new planet",
      // here we will keep our translations for different languages
    },
  },
  de: {
    translation: {
      planet: "Planeten",
      createPlanet: "Erstellen Sie einen neuen Planeten",
    },
  },
},
I have added german as my second language option in my application and to give the user the option to pick language within the application let’s do
const languages = {
  en: { nativeName: "English" },
  de: { nativeName: "Deutsch" },
};

function YourComponent {
 return (
   // ... rest of your component

    // place where you want to place the buttons
    {Object.keys(languages).map((langauge) => (
      <button
        key={langauge}
        style={{
          fontWeight:
           i18next.resolvedLanguage === langauge ? "bold" : "normal",
        }}
        type="submit"
        onClick={() => i18next.changeLanguage(langauge)}
      >
        {languages[langauge].nativeName}
      </button>
    ))}

   // ... rest of your component
 )
}
You can also automatically pick users’ default browser language using the npm package i18next-browser-languagedetector.
BOBS YOUR UNCLE🥳
BOOOOOOOMMM 🚀

Wrap Up
Now you can add as many languages as you want and your application will flawlessly support it. This might be even easier for you if you don’t hardcode your strings 😜. Anyways this is to carry on with good coding practices and see at the next one. Not a goodbye.
💬 Leave a comment