Sending emails is an essential part of many application. In this article, we’ll work through a full-stack solution for sending emails in Next.js, using Next.js API routes, along with SendGrid, a great API service for sending emails.
Setting Up
To use SendGrid, you’ll need to create an account. Head over to their website and sign up for a free account. Once you’ve signed up, you’ll be able to access your API key, which we’ll use in the next step.
Next.js
We’ll also need to set up our Next.js app. Firstly you’ll need to install the SendGrid API, using:
npm install --save @sendgrid/mailYou should also have a Sendgrid API key from creating your account. We’re going to store this as an environment variable. If you already have a .env.local file, you can go ahead and add this line:
SENDGRID_API_KEY='your-key-here'Or you can create the file and add in your key using:
echo "export SENDGRID_API_KEY='your-key-here'" > .env.localBack-End
We’re going to start off with building an API route to send your emails. Next.js uses file-based routing, including API routes. We’ll be creating ours in “pages/api/send-email.ts“.
Next, here’s the content in the file:
import sgMail from '@sendgrid/mail';
sgMail.setApiKey(process.env.SENDGRID_API_KEY);
const TO_EMAIL = process.env.TO_EMAIL ?? 'default@gmail.com';
const FROM_EMAIL = process.env.FROM_EMAIL ?? 'default@gmail.com';

export default async (req, res) => {
    const { email, message } = req.body;
    const msg = {
        to: TO_EMAIL,
        from: FROM_EMAIL,
        subject: 'Mail from ' + email,
        text: message,
        html: message,
    };
    try {
        await sgMail.send(msg);
        res.status(200).send('Email sent successfully');
    } catch (error) {
        console.error(error);
        res.status(500).send('Error sending email');
    }
};
Let’s talk through the code:
Firstly we need to set up our SendGrid API. This is simple with the SendGrid library, we just need to call sgMail.setApiKey().
Then, we have some parameters to set up, including the address our email is coming from, and the to address. I’ve added these as environment variables, but you can store these wherever you like.
Next, we move on to our actual handler function. We’ll be passing the parameters for our message on the front end, in the body of our request. Then we construct our message object very simply, providing our email addresses, a subject and the message itself.
When we send the message, the whole block is wrapped in a try block, just in case we get an error back attempting to perform the API request.
Finally, we use the callback object provided to our handler to either send back a success, or an error response.
Front-End
Onto the front end, we’ll set up a simple contact form:
type FormInputs = {
    email: string;
    message: string;
};
export function Contact() {
    const {
        register,
        handleSubmit,
        formState: { isSubmitted },
    } = useForm<FormInputs>({
        shouldUseNativeValidation: true,
    });
    const onSubmit: SubmitHandler<FormInputs> = (data) => {
        const params = { email: data.email, message: data.message };
        axios.post('/api/send-email', params).then((res) => console.log(res));
    };
    return (
        <section className="flex h-screen w-full max-w-screen-md flex-col gap-5 p-10">
            <h2 className="w-full text-center text-4xl font-bold text-stone-50">
                Contact Me
            </h2>
            <form
                className="flex flex-col gap-2"
                onSubmit={handleSubmit(onSubmit)}>
                <input
                    type="email"
                    className="rounded p-2"
                    placeholder="email"
                    {...register('email')}
                />
                <textarea
                    className="rounded p-2 text-start"
                    rows="5"
                    placeholder="message"
                    {...register('message')}
                />

                <button
                    className="rounded bg-stone-800 p-2 text-stone-50"
                    type="submit">
                    <FaArrowRight />
                </button>
            </form>
        </section>
    );
}
I’m using React Hook Form to handle the form logic here, as well as Tailwind for styling. Our actual form is very simple, just two text input elements, as well as a submit button. Inside our onSubmit callback function, we just have to forward on the data in our form with a post request to the API route we’ve just created.
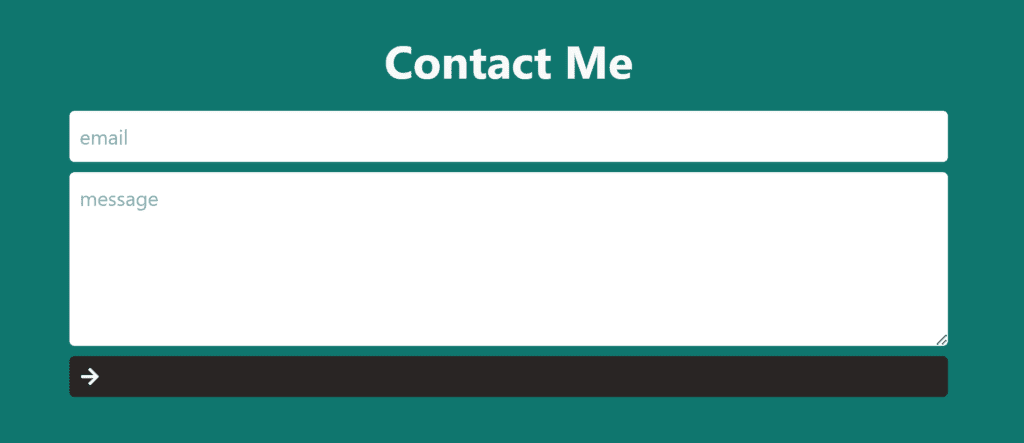
And here’s what the end result looks like:
And that’s everything! We’ve set up our back-end API route, and connected this to a simple front-end form. Thanks for reading, if you liked this article, or if you’ve had any issues following along, feel free to leave a comment below!
💬 Leave a comment