Have you ever visited a website with a long list of items, only to feel overwhelmed and lost in the sea of information? That’s where pagination comes in handy. By dividing content into smaller, manageable chunks, pagination helps users navigate through a website more easily and efficiently. In this article, we’ll explore how to implement pagination in Next.js, a popular React-based framework for building server-rendered applications. Whether you’re building an e-commerce site, a blog, or any other type of web app that requires pagination, this tutorial will guide you through the steps to make it happen in Next.js. So, let’s dive in!
Routing
To start off, we’re going to need some way of getting our pagination parameters, e.g. what page we’re on. You could approach this a few different ways, either with query string parameters, or dynamic routing. In this article, we’ll be using Next.js’ dynamic file-based routing. To set this up, all we have to do is create a dynamic route:
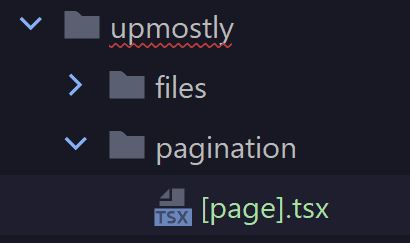
Whenever we navigate to “/upmostly/pagination/(pageNumber)”, the component in “[page].tsx” gets served up, and we get the pageNumber passed to our component. I’ll be using some pre-rendering, and fetching our pagination data using getServerSideProps:
Server-Side Rendering
I’m going to be using SSR in this pagination component, to be able to pre-fetch the data. You might be wondering what we’re fetching; we’ll be building a page to display some data from PokeAPI, and traversing through it using pagination.
SSR in Next.js starts off with getServersideProps:
export const getServerSideProps: GetServerSideProps = async (context) => {
    const offset = Number(context.params?.page ?? '0') - 1 + '0'; //We're getting 10 pokemon at a time, easier to just add a 0 on to the string
    const url = 'https://pokeapi.co/api/v2/pokemon';
    const params = new URLSearchParams({ limit: '10', offset: offset });

    const pokemonUrls = await axios
        .get<{ results: { name: string; url: string }[] }>(
            url + '?' + params.toString()
        )
        .then((res) => res.data.results);
    const pokemon = await Promise.all(
        pokemonUrls.map((p) => fetchPokemon(p.url))
    );
    //console.log(pokemon);
    return { props: { pokemon } };
};
The details of how we’re getting the data might be a little confusing, but the short version is:
- We take in a page number as a parameter
- We’re getting 10 pokemon at a time, so we multiply it by 10 to get our offset through the pokedex, e.g. /2 should be Pokemon 20-30
- We do some API calls to:
- Firstly get the endpoints for the pokemon we want
- Then fetch all the data for the pokemon we want
- Then we pass that list of data to our page component as props
All this happens on the server, when you make a request for the page.
Front-End
Next, we move on to our front-end. Here’s what it’ll look like:
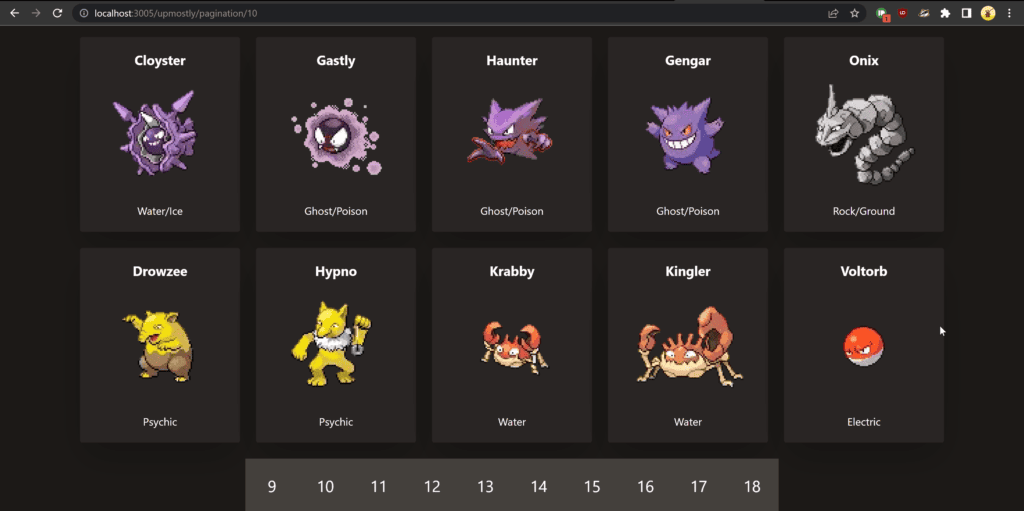
Pretty straightforward, we’re displaying some data about our pokemon, and you can use the page selector at the bottom to navigate through it.
We’ll start from the top-down, starting from our page component:
export default function Page({ pokemon }: { pokemon: Pokemon[] }) {
    const { query } = useRouter();
    const { page = '1' } = query;
    return (
        <div className="flex h-screen w-full flex-col items-center justify-center gap-6 bg-stone-900 p-12 text-white">
            <div className="grid auto-rows-auto grid-cols-5 gap-6">
                {pokemon.map((p) => (
                    <PokemonCard key={p.name} {...p} />
                ))}
            </div>
            <PaginationBar page={page as string}/>
        </div>
    );
}
We have a simple page split into our cards, and our navigation. Inside here we get the page number in order to pass that on to the pagination bar, so it knows which pages to display.
We combine this together with some styling from Tailwind, to get the page you see above.
The contents of the PokemonCard component don’t matter as much, just know that we get our data in through the pokemon prop, and iterate through that to display our cards.
We’ll drill into the PaginationBar component next:
function PaginationBar({ page }: { page: string }) {
    const pages = Array.from({ length: 10 }, (_, i) => {
        const pageNumber = Number(page);
        return i - (pageNumber === 1 ? 0 : 1) + pageNumber;
    });
    return (
        <div className="flex flex-row">
            {pages.map((p) => (
                <PaginationLink key={p} page={p}>
                    {p}
                </PaginationLink>
            ))}
        </div>
    );
}
This again is quite a straightforward component. The steps are essentially:
- Generate a list of pages, starting with the page before ours
- If the page before ours doesn’t exist, just shift everything up 1
- Map over those pages and generate a PaginationLink for each one, which is just a link to the corresponding page with some extra styling
Then whenever we click those links, the page gets reloaded, and getServerSideProps gets called for our new page index to generate our new page.
Conclusion
Thanks for reading! I hope you found this article a helpful exploration into how to build a simple pagination component in Next.js.
One thing to note here is that we could also have chosen getStaticProps for this site, since the data from our Pokemon API isn’t likely to change any time soon. If you’re interested in the difference, you can check that out here.
If you liked this article, if you had any troubles following along, or just any questions, feel free to leave a comment below!
💬 Leave a comment